
The Activity Forecast feature allows you to simulate demand by configuring various types of tasks.
You can create forecasts based on either:
-
Real activities and operations already present in the system.
-
Simulated activities
A significant advantage of using activity forecasts is their complete independence from actual activities and work-orders data. This means any adjustments or edits made within the forecast simulation will not impact the live operational data in your system.
Before you start
-
Create the activity forecast
-
Learn how to add activities: Add activities
-
Learn how to add simulated timeframes: Add simulated timeframes
-
Learn how to add timeframes from real Work Orders: Add timeframes from Work Orders
Navigate on the Gantt view
-
In the FSM App, navigate to FEATURES → FORECASTING & CAPACITY PLANNING → ACTIVITY FORECAST
-
Use the filter panel to search for existing forecast records
-
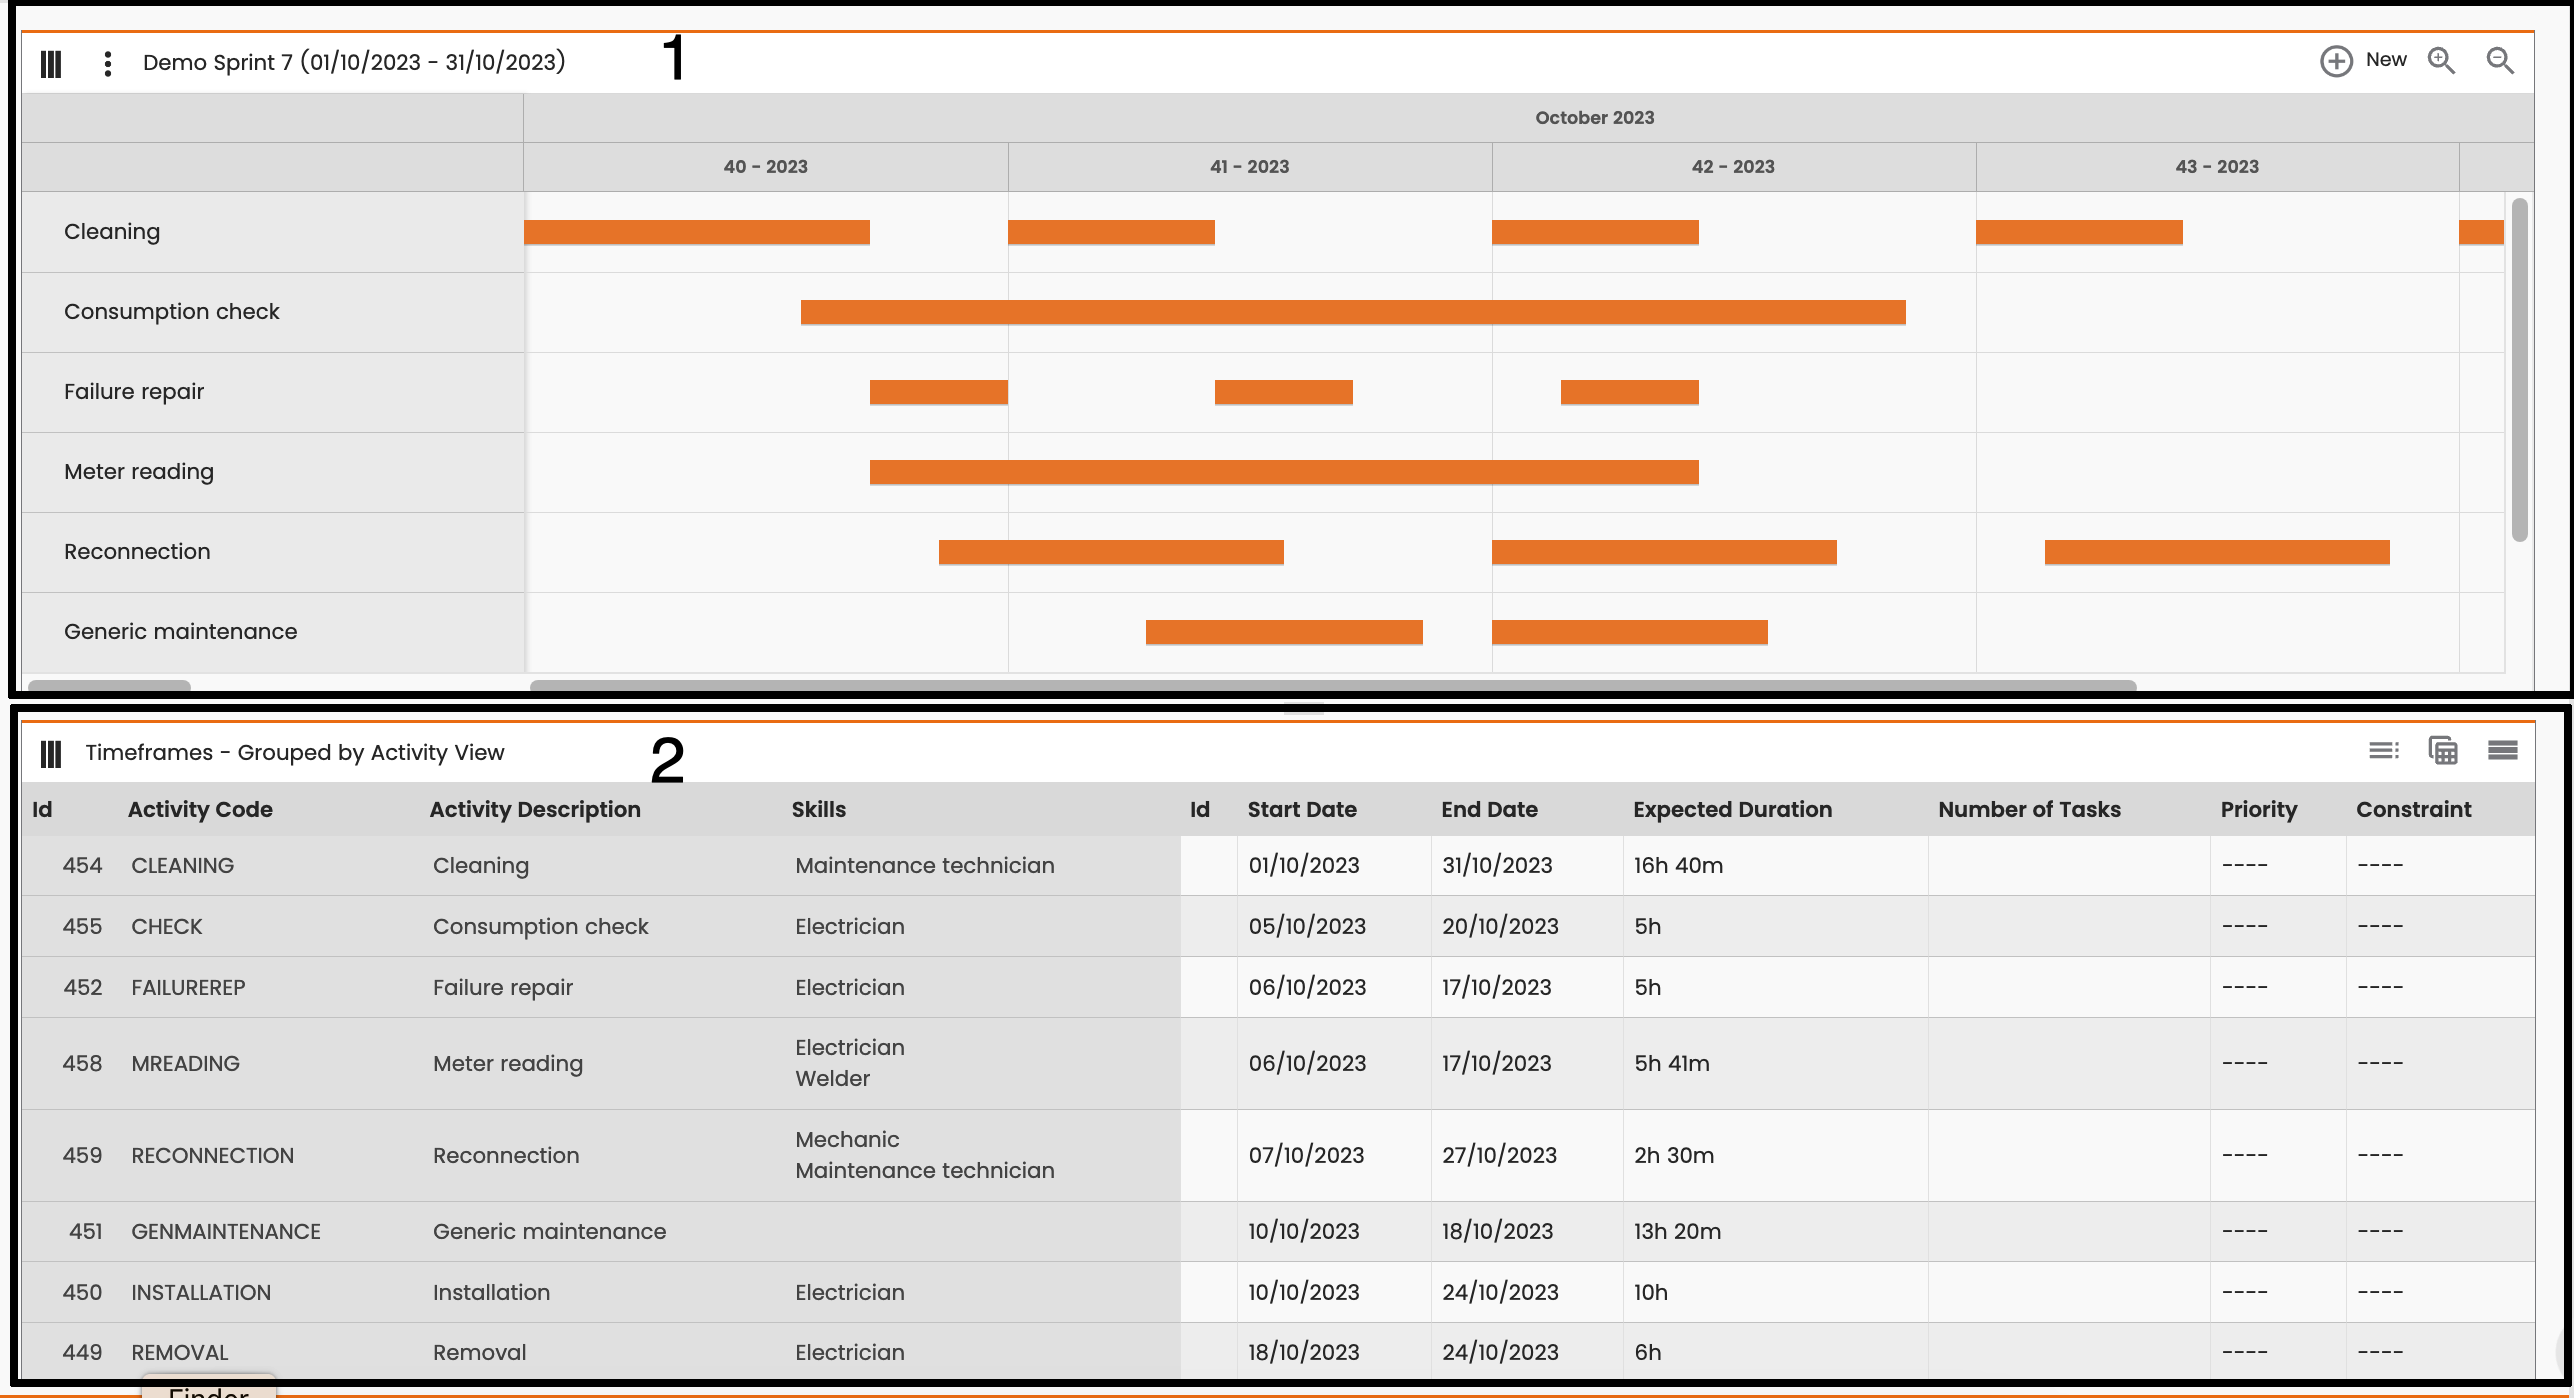
Clicking the option button related to the Activity Forecast, going on “Detail” option the configuration page will be showed as a gantt view.
The Activity Forecast configuration page is composed by two parts:
|
|
Figure 1 - Activity forecast detail page |
-
Gantt view (Figure 1 - Activity forecast detail page - icon 1)
-
The Gantt view contains a row for each activity, and for each activity there are one or more timeframes to define the execution period. The detail of each activity and timeframe is in the Timeframe table.
-
-
Timeframes table (Figure 1 - Activity forecast detail page - icon 2): the table is grouped by Activity code and shows data about timeframes.
|
|
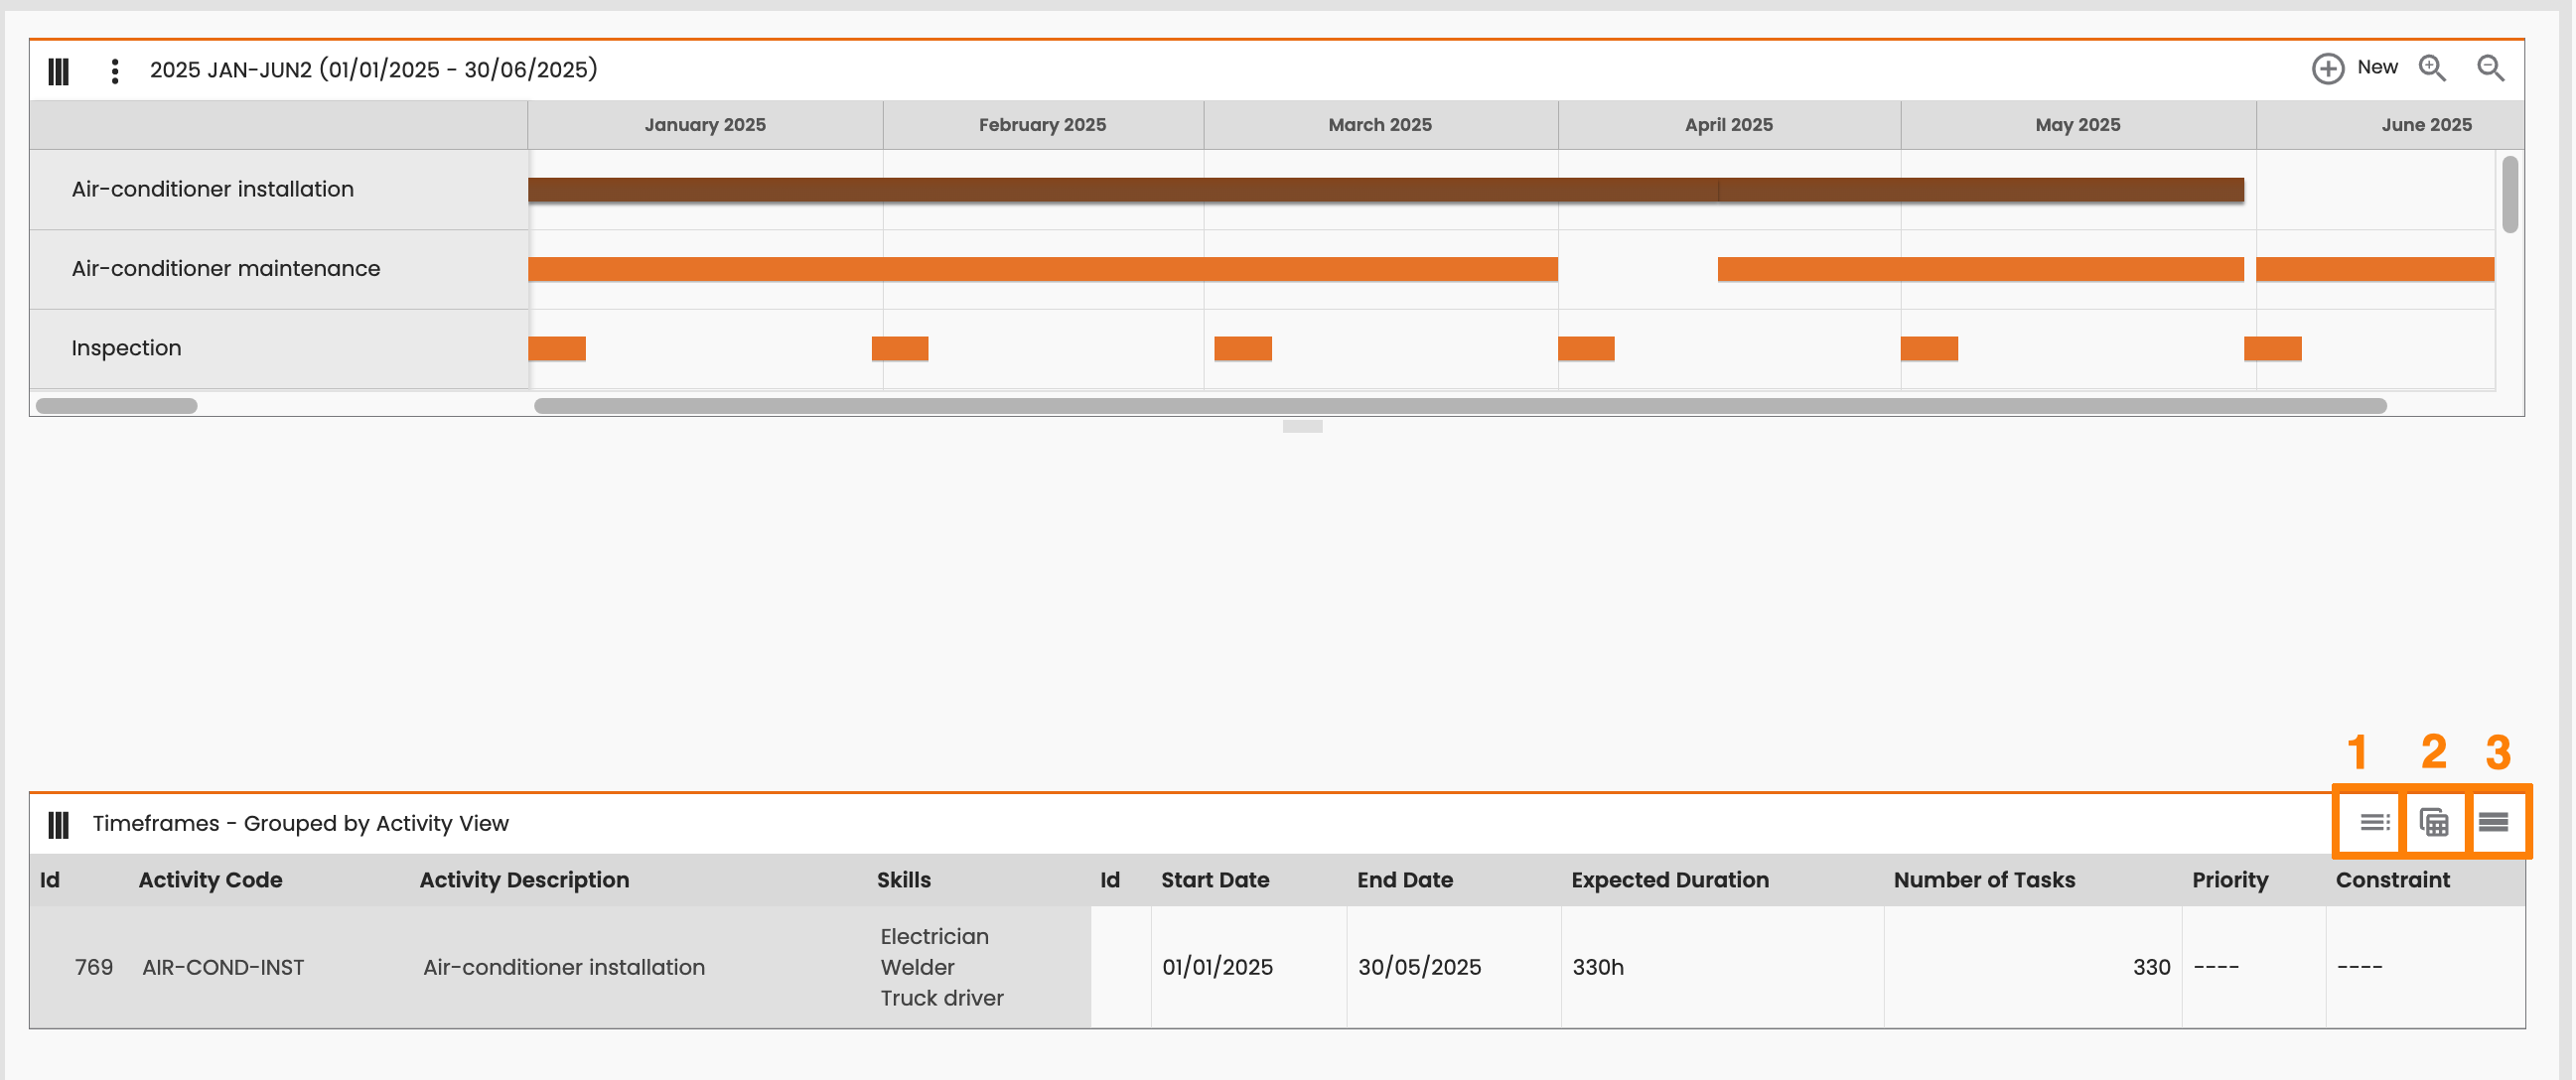
Figure 4 - Select an activity |
Going on the top-right of the timeframe table, there are three icons:
-
Detail View (Figure 4 - Select an activity - icon 2): to explode all timeframes contained in an activity. Without selecting a row, this option allows to explode all timeframes of all activities.
-
Grouped by Activity view (Figure 4 - Select an activity - icon 1): to collapse an activity grouping all timeframes by activity code (as showed in Figure 4 - Select an activity)
-
Select none ((Figure 4 - Select an activity - icon 3): to clear the table and to return to initial status (as showed in Figure 3 - Timeframe table detail)