
This topic provides instructions on how to configure Color Themes for Work Orders (WOs) in FSM. This can help dispatchers easily identify different types of WOs based on multiple criteria and take action accordingly.
When to Perform This Task
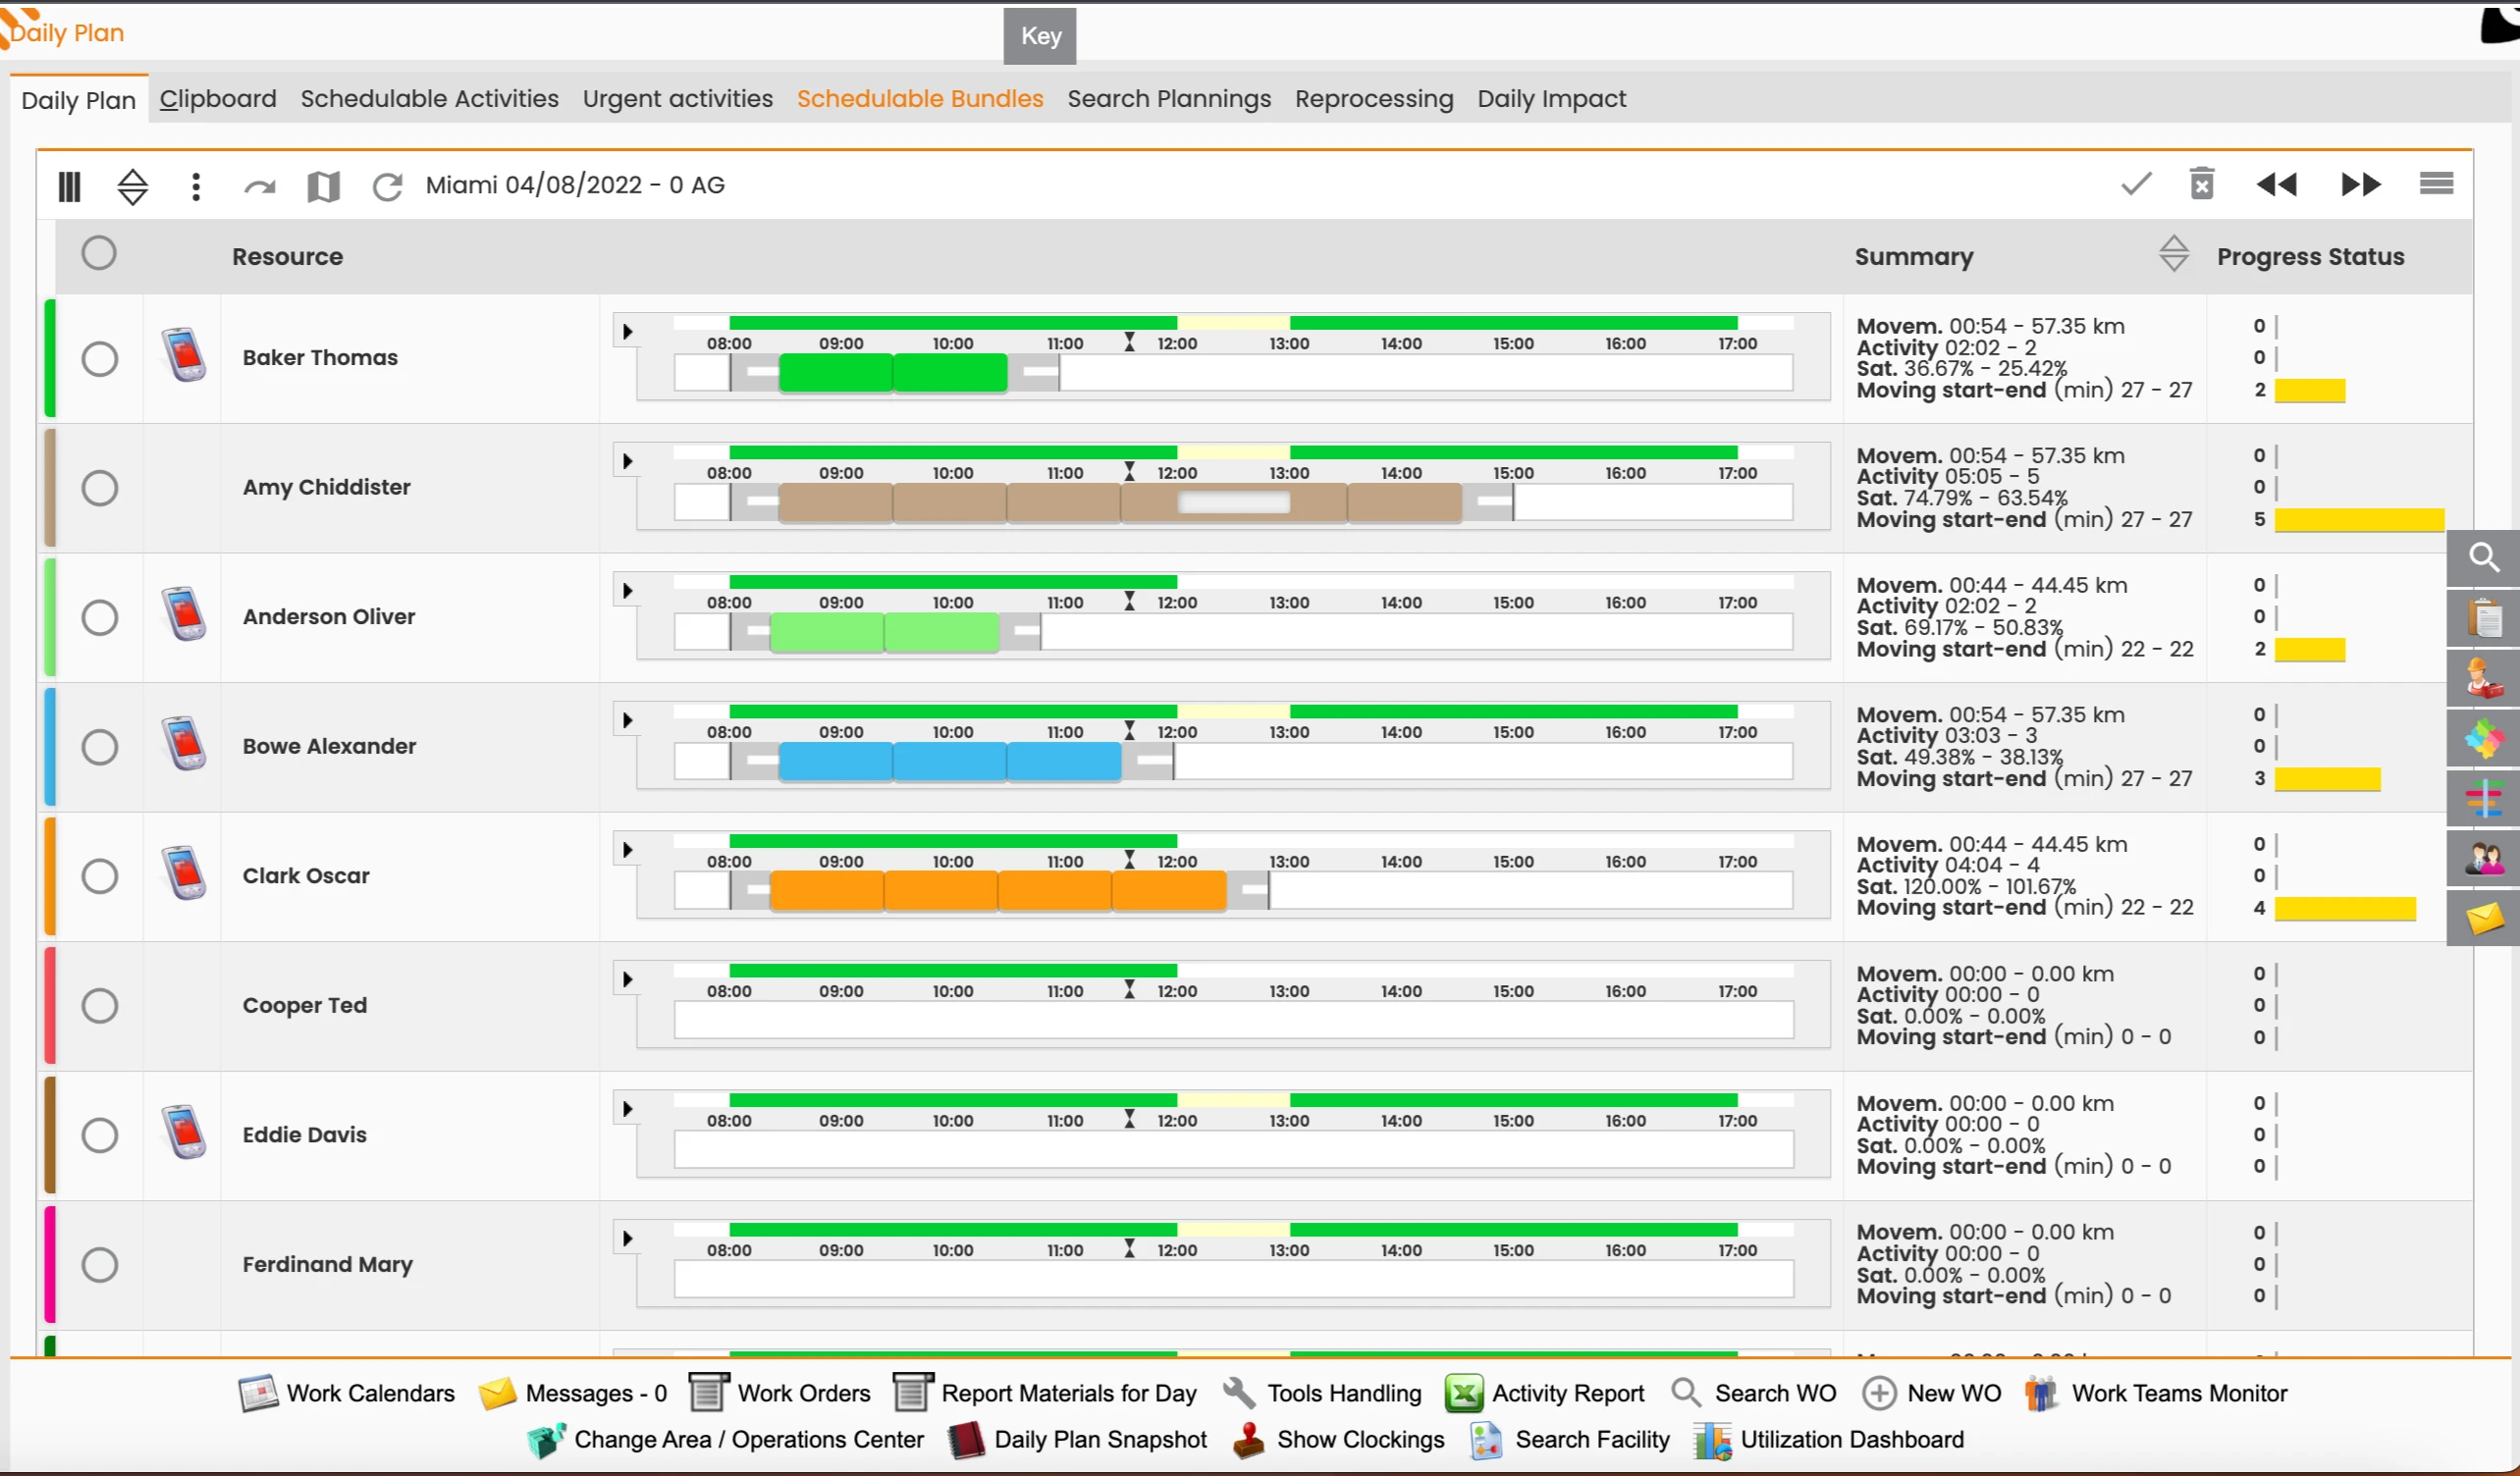
You should configure themes when you want to visually differentiate activities on the Daily Plan based on their status, type, or other advanced filtering criteria. This helps in quickly identifying and prioritizing tasks.
Prerequisites
To configure themes, you must have access to the "Configure Monitor" option within the FSM Daily Plan.
Step-by-Step Instructions
1. Access Theme Configuration
-
Navigate to the Daily Plan in FSM.
-
Click the Options Menu (represented by three dots), typically located in the top right corner of the Daily Plan interface.
-
Select Configure Monitor from the dropdown menu.
-
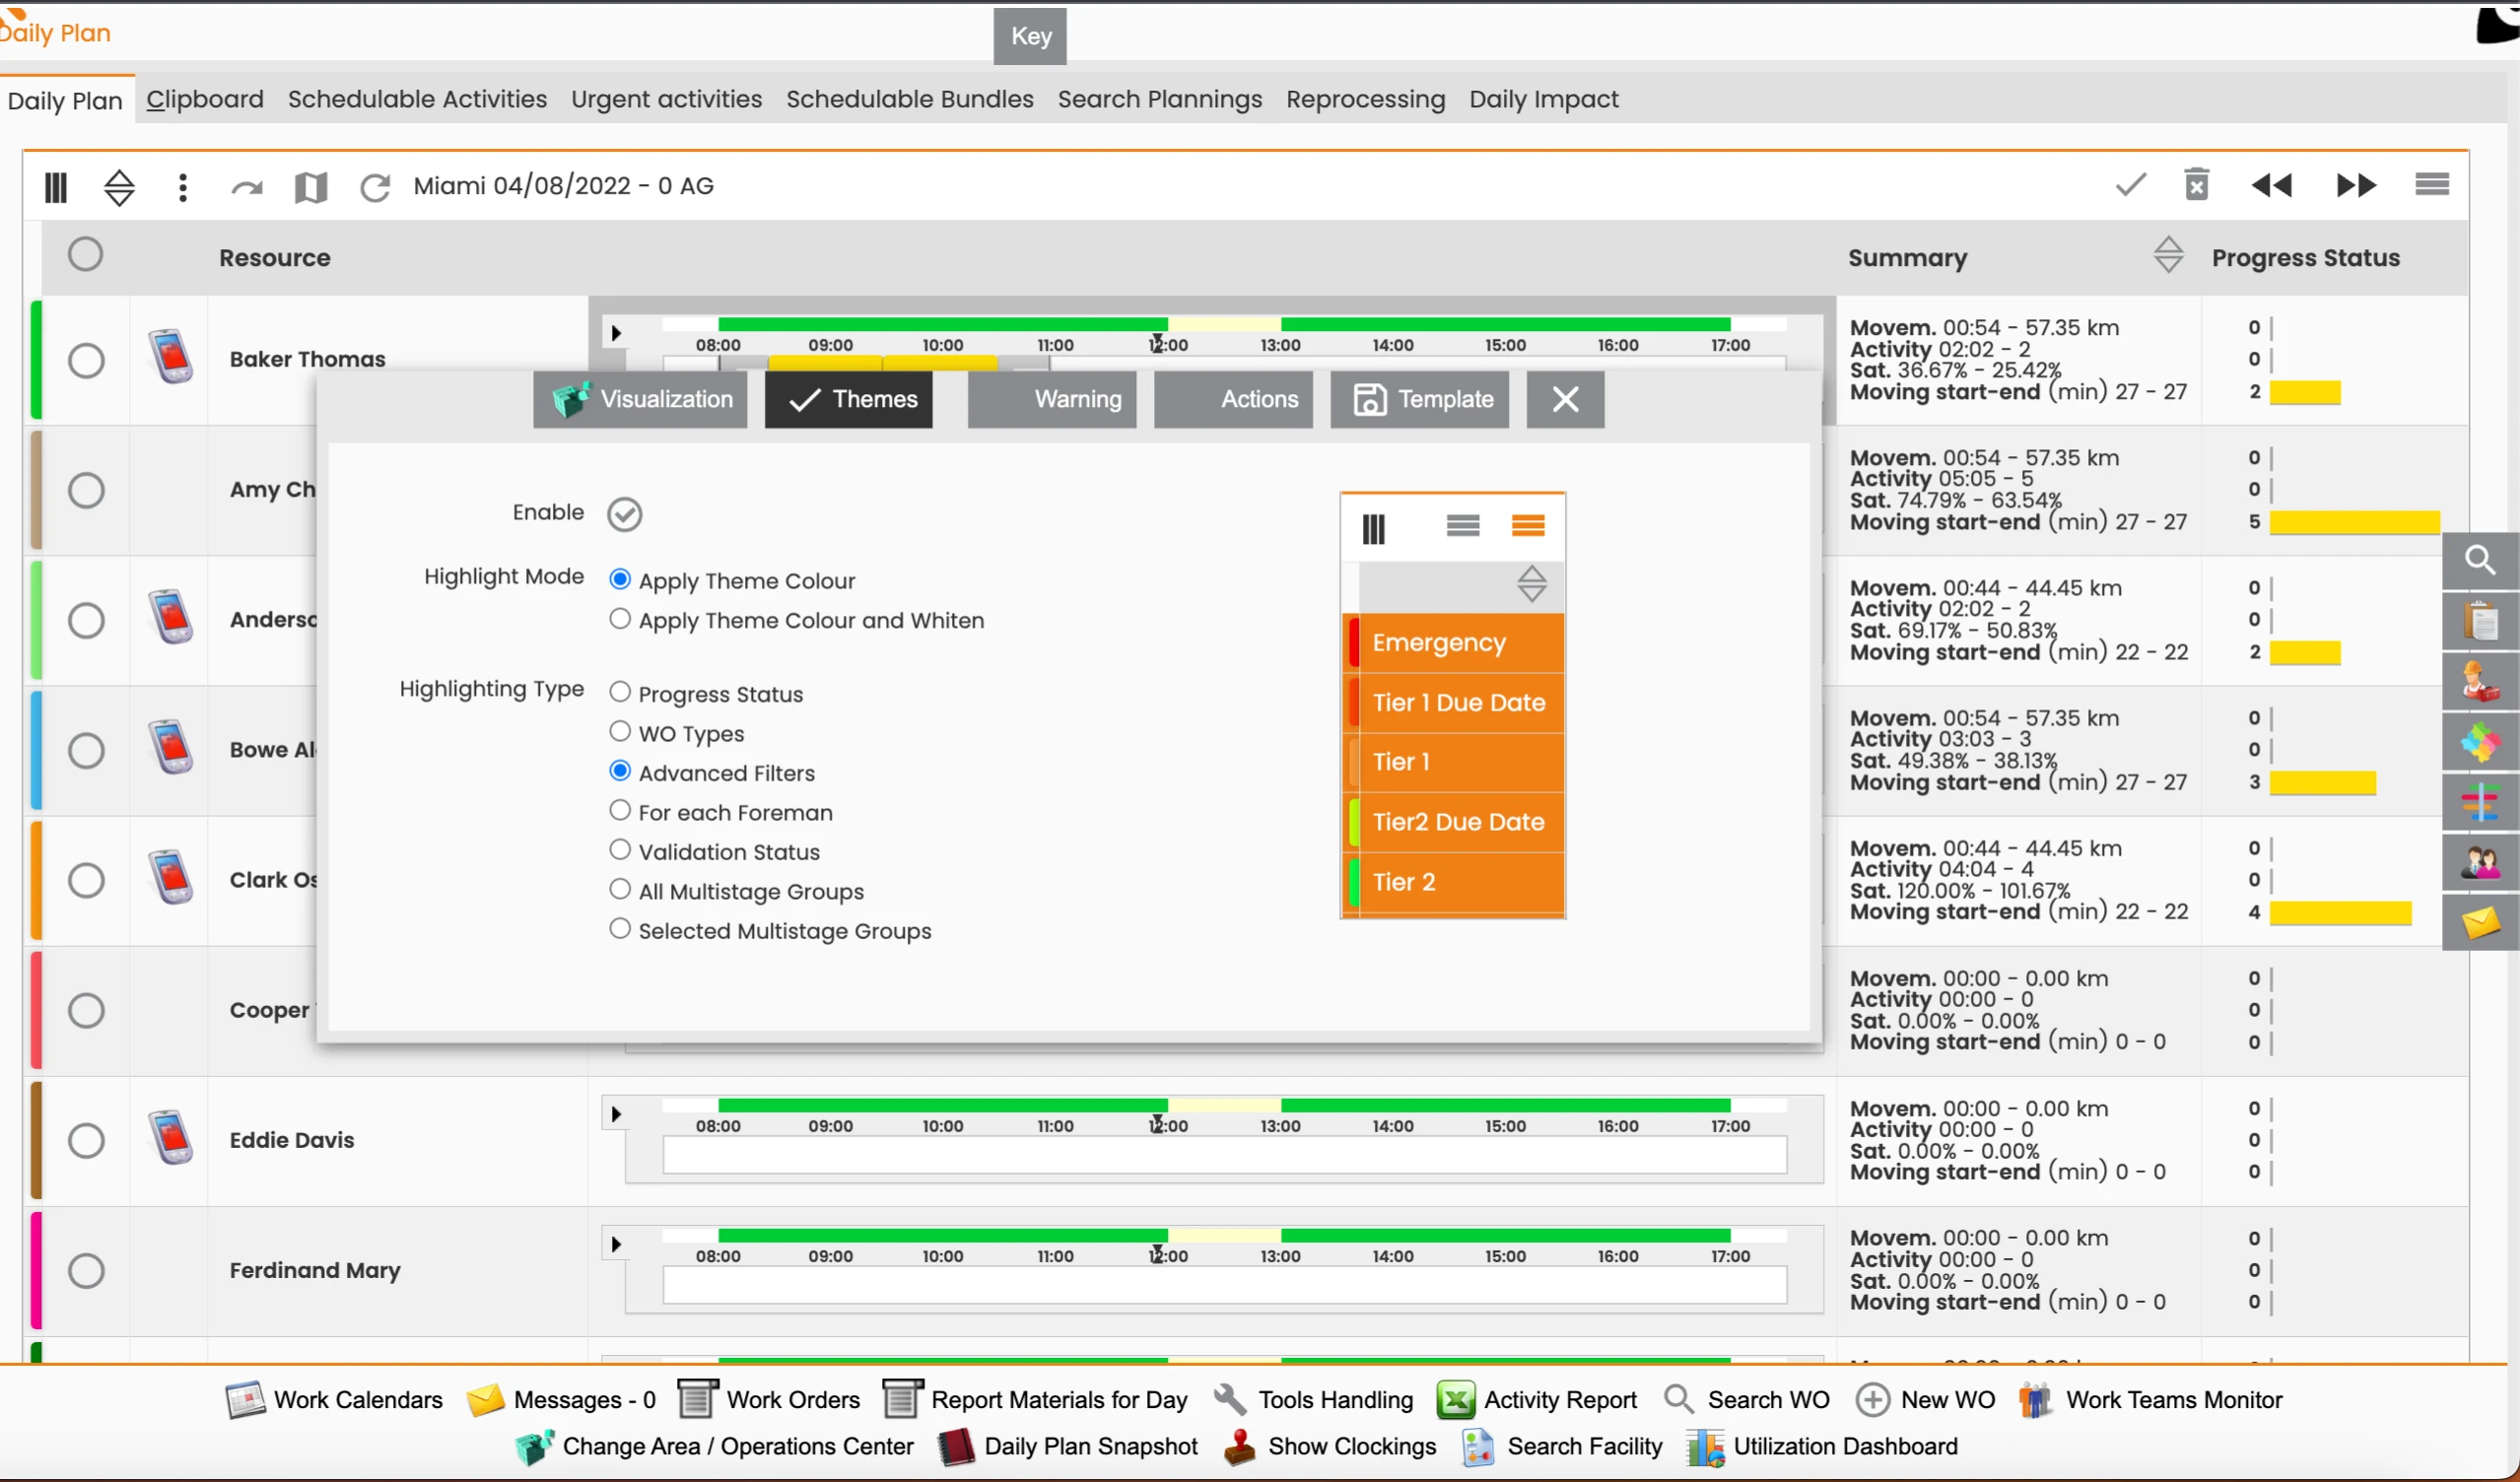
In the pop-up window, click the Themes tab. You can drag this pop-up to reposition it on your screen.
2. Enable Themes
-
In the Themes tab, locate the Enable option.
-
Toggle the Enable switch to the On position.
-
Note: If this option is disabled, none of the theme settings will apply to the Daily Plan. The scheduling details will remain unedited by the theme's filter criteria.
-

3. Select Highlighting Mode
Once themes are enabled, choose how the information will be highlighted on the Daily Plan. The system provides two modes:
-
Apply Theme Color (Default):
-
If active, the system applies the color of the chosen theme based on the Highlighting Type you select. All other activities will retain their original colors.
-
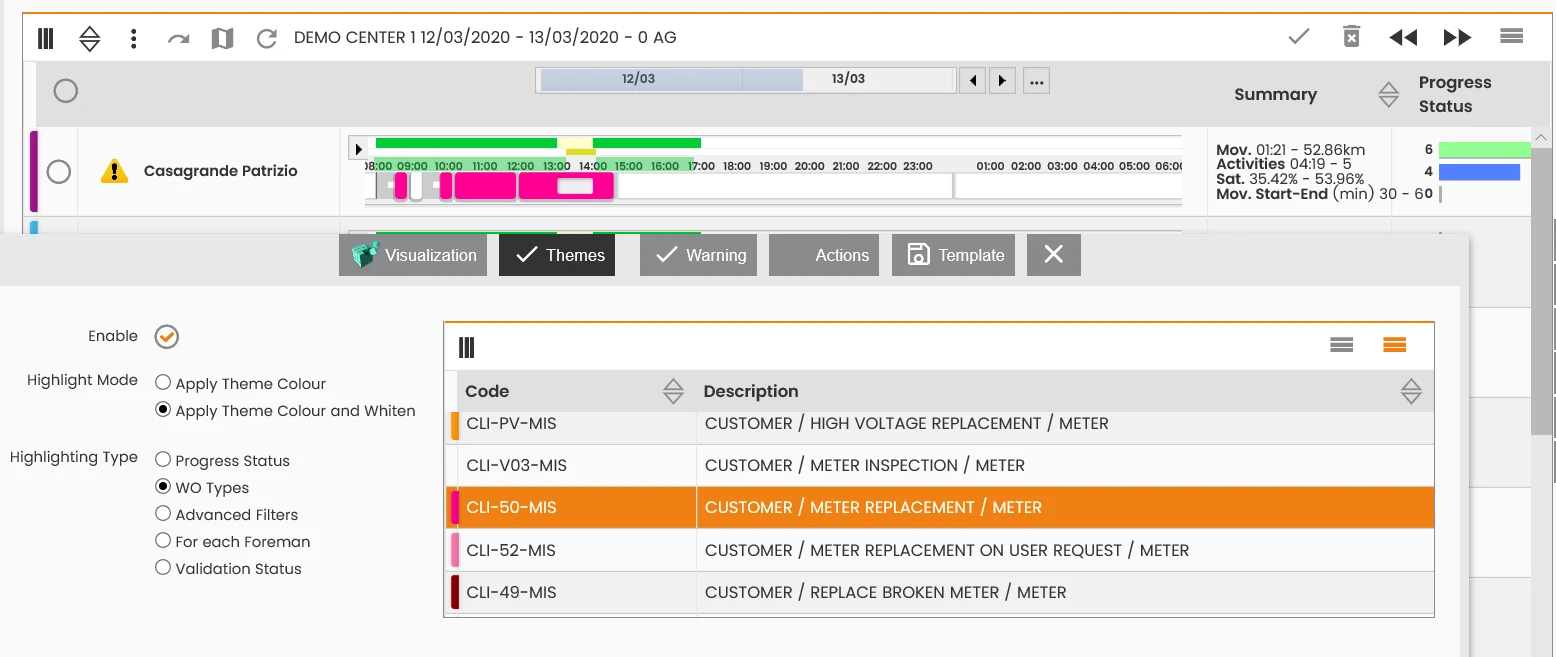
Example: If you select "WO Types" as the Highlighting Type and choose a specific Work Order (WO) Type (e.g., "CUSTOMER/METER REPLACEMENT/METER") with an orange theme color, all activities matching that WO Type will appear orange. Other activities will keep their default colors (e.g., yellow, red, brown).
-
-
Apply Theme Color and Whiten:
-
If active, the system applies the color of the chosen theme based on the Highlighting Type, and all remaining activities will be displayed in white.
-
Example: Using the same WO Type example as above, activities matching the selected WO Type will be orange, while all other activities will turn white.
-
4. Choose Highlighting Type
This option defines the criteria used to highlight activities on the Daily Plan.
-
Progress Status: Highlights activities based on their current status.
-
Finalized Activities: Activities completed with a conclusive outcome are highlighted in light green.
-
Activities to Reschedule: Activities closed with a partial outcome, requiring rescheduling, are highlighted in blue.
-
Activities not forwarded: Activities not yet sent to mobile devices are highlighted.
-
Not validated yet: These activities are colored violet.
-
Taken in charge: Activities forwarded to mobile devices and accepted by the technician are highlighted in fuchsia.
-
-
Suspended Activities: Activities finalized with a blocking (suspensive) outcome are highlighted in real-time.
-
-
WO Type: Customizes highlighting based on the Work Order (WO) type.
-
The system uses colors defined in the WO Types master data. Activities matching the selected WO Type will be highlighted in the corresponding color, while others retain their original color (unless "Apply Theme Color and Whiten" is selected).
-
-
Advanced Filters: Allows for highly customized highlighting based on specific activity types defined through WO Filters.
-
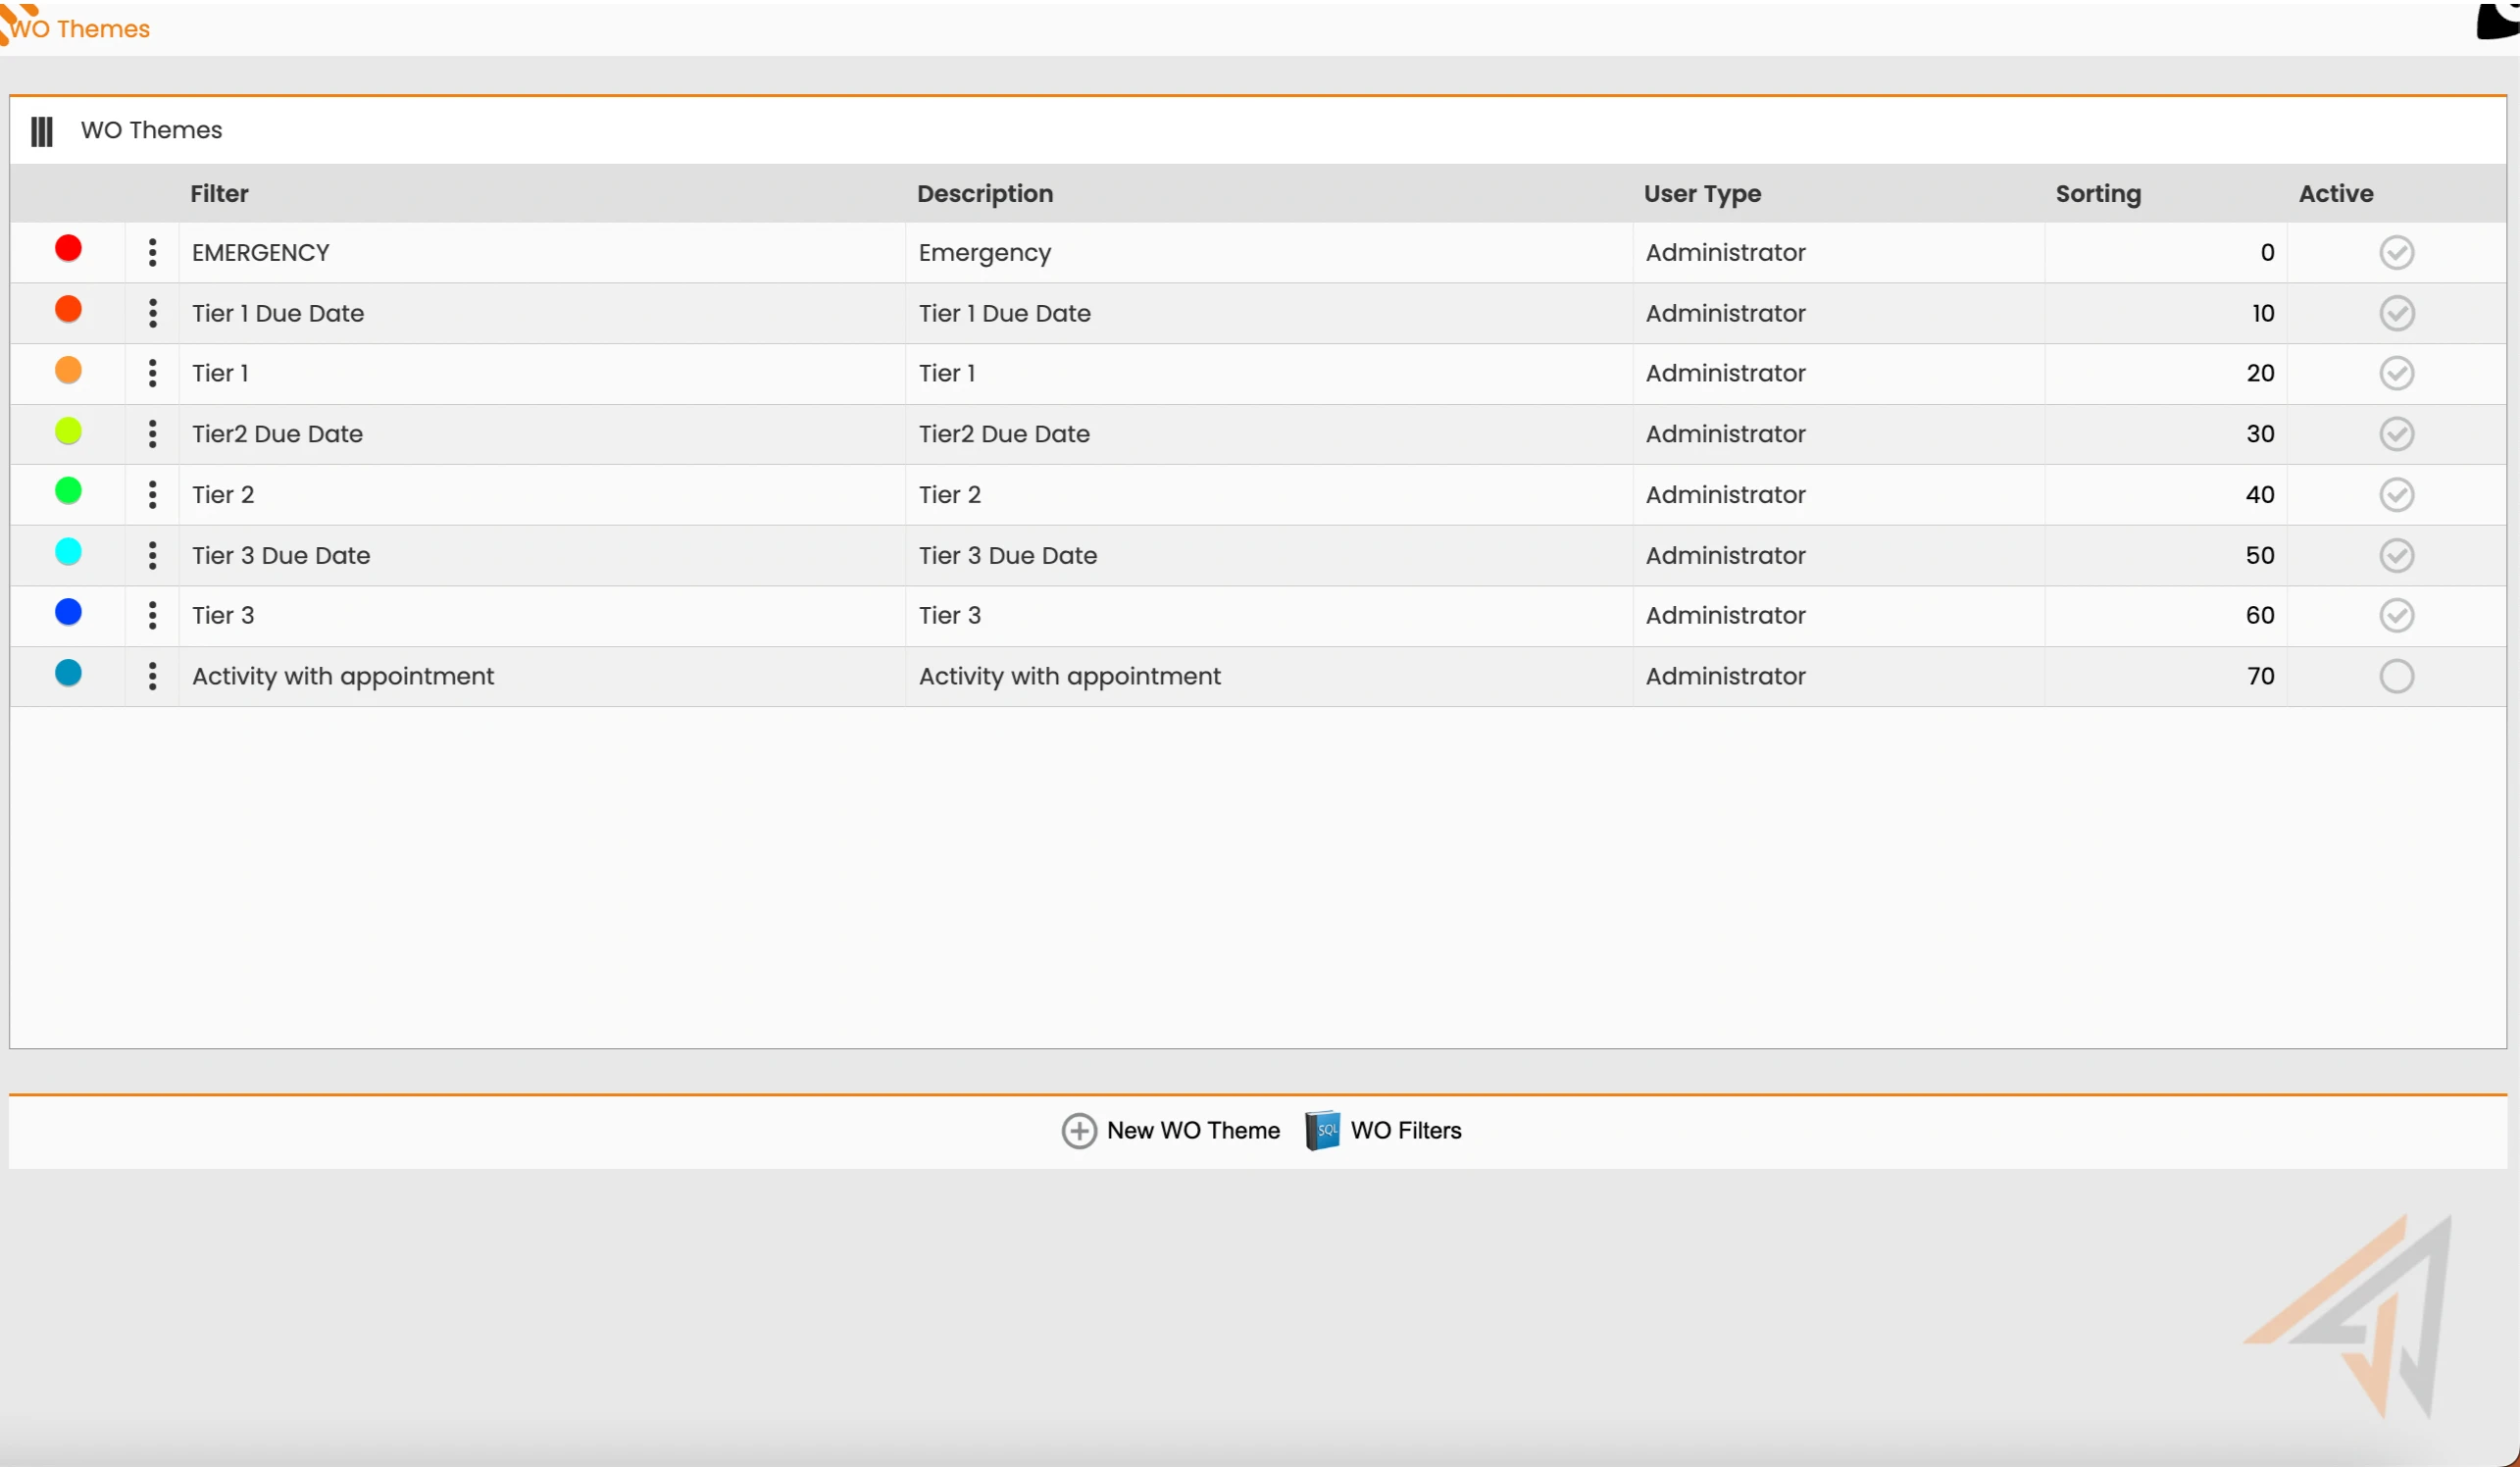
Configuration: To set up these advanced filters, navigate to Core module > Parameters > WO Themes in FSM. On this page, you can define different highlighting rules for WOs (Daily Plan visualization, schedulable activities, etc.).
-
WO Themes Page Fields:
-
Highlighting color: The color used for WOs matching specific rules.
-
Filter: The name of the associated filter.
-
Description: A general description of the theme.
-
User type: Indicates which user roles can apply this theme.
-
Sorting: Determines the order in which the theme appears in the list.
-
Active: Toggles the theme's activation status.
-
-
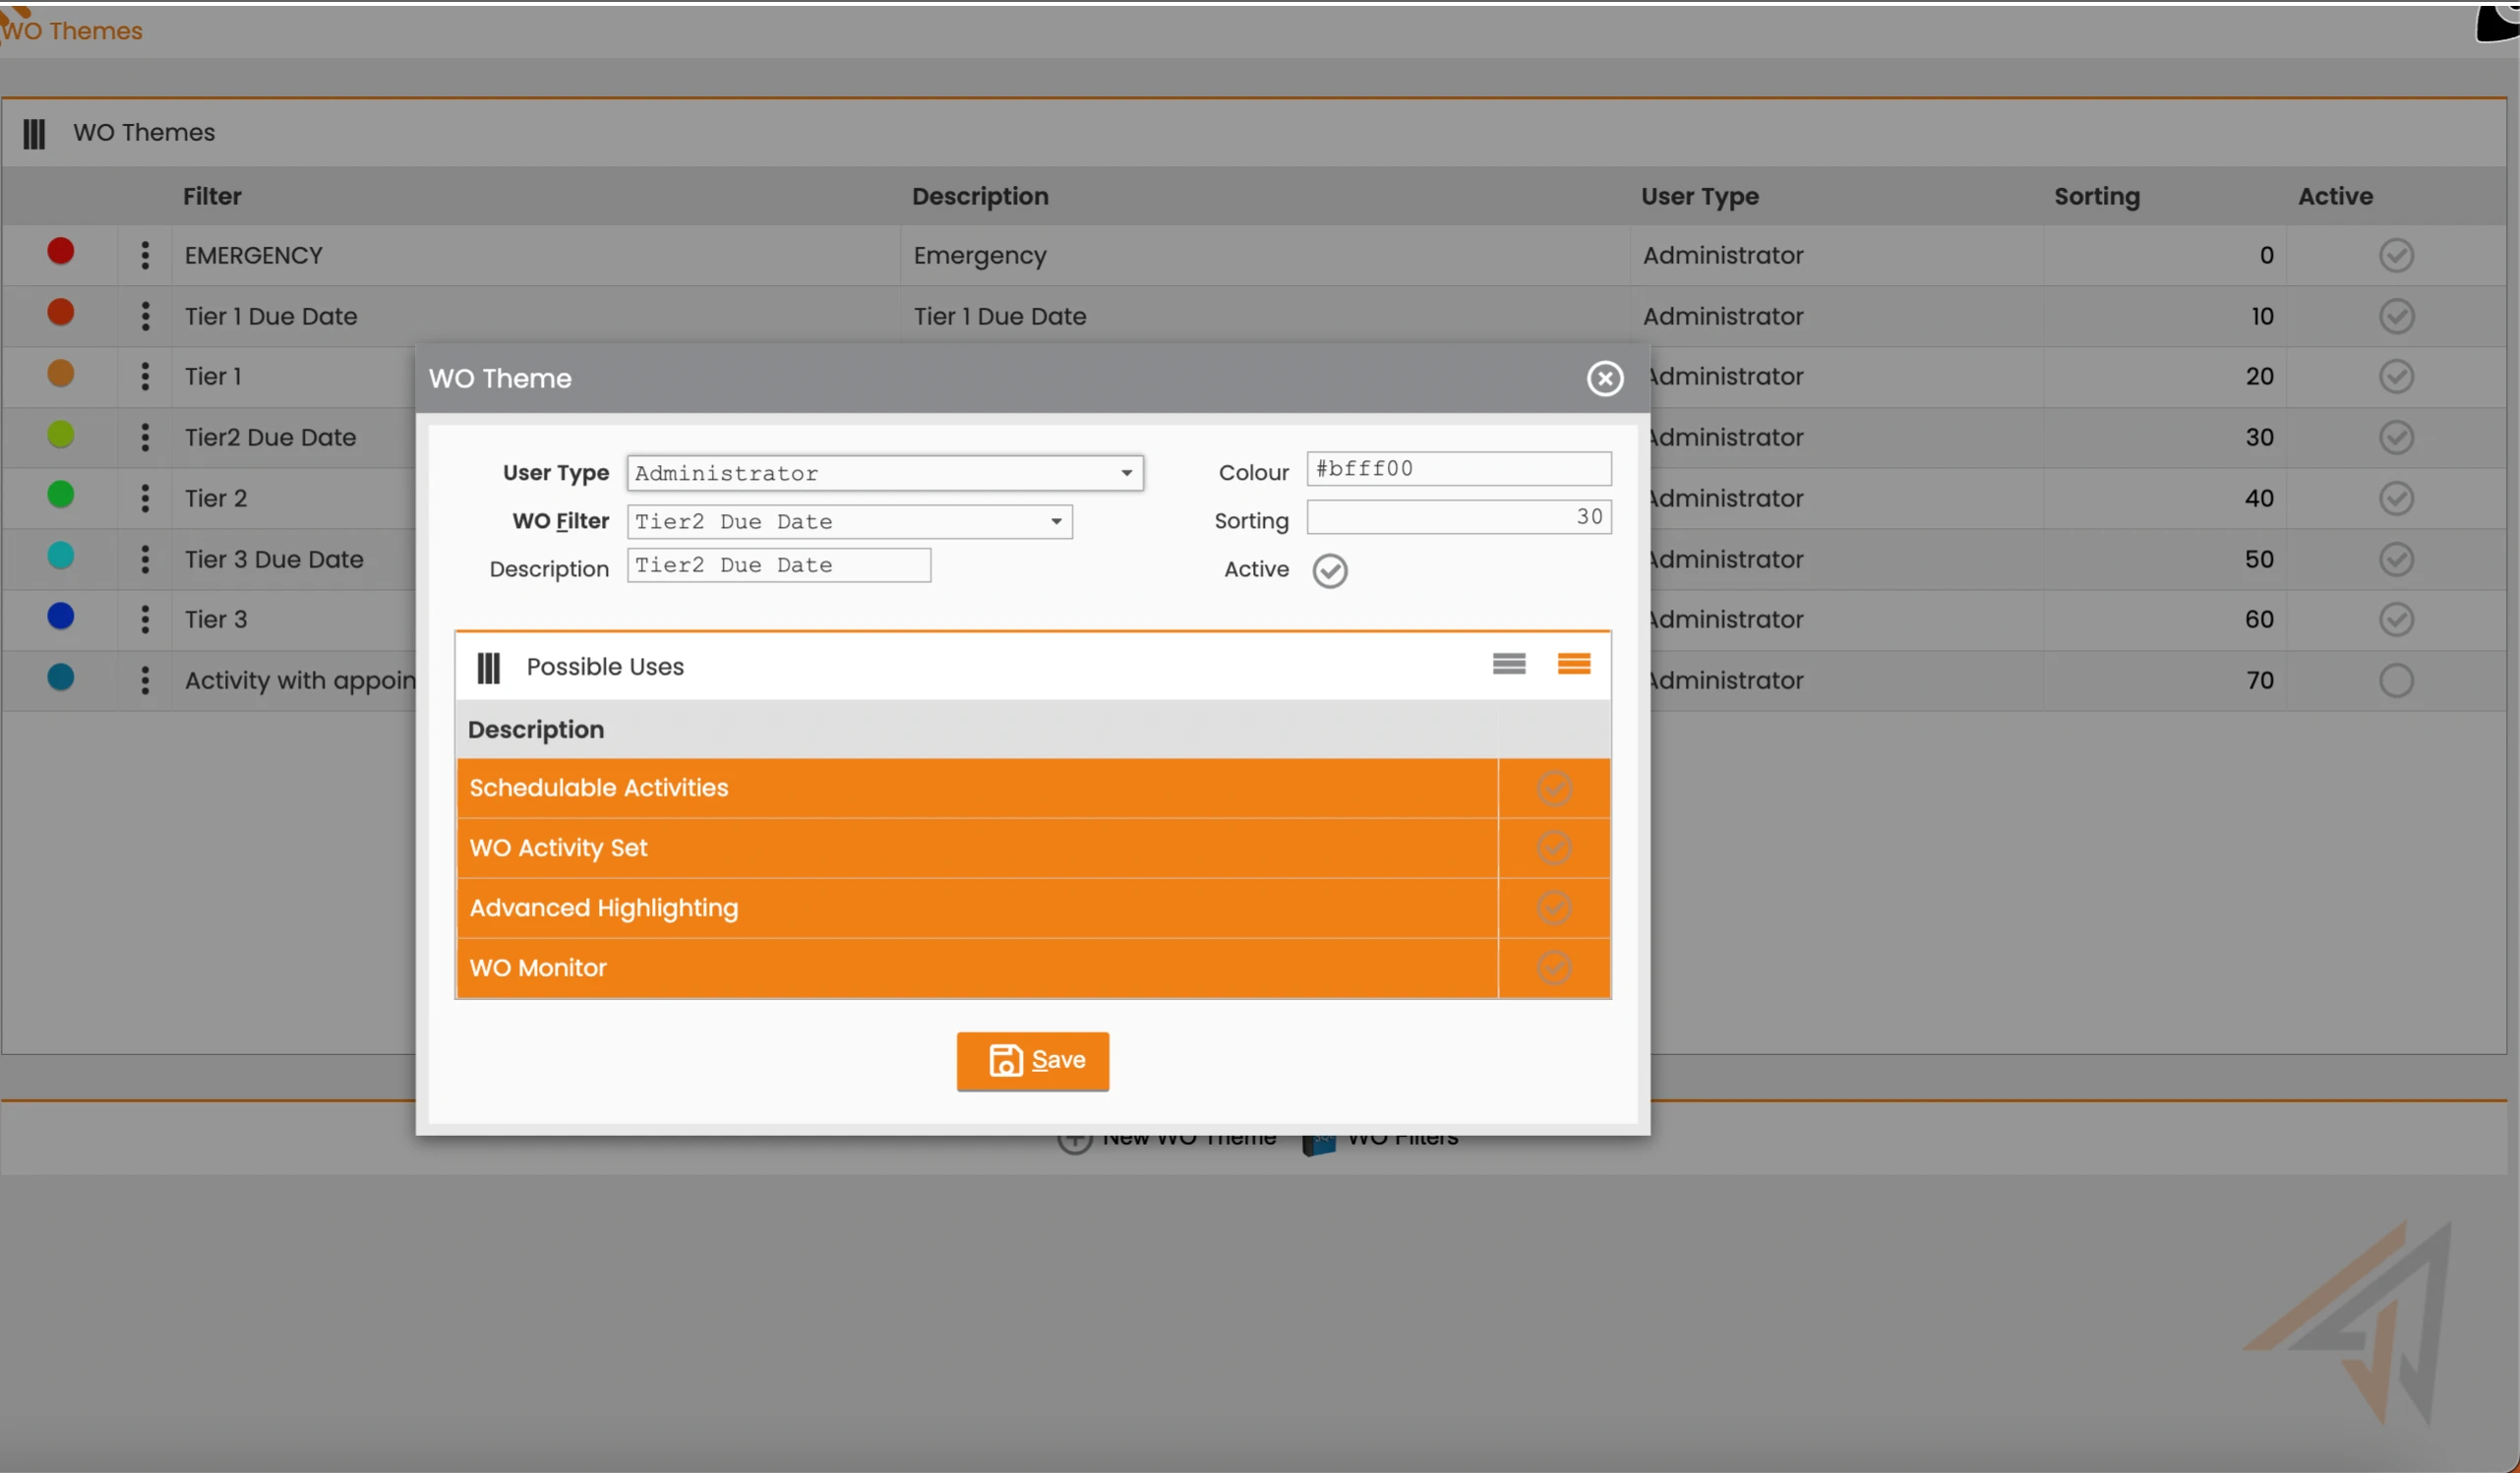
Create a New WO Theme: Click New WO Theme at the bottom of the WO Themes page. Fill in the required fields (Highlighting color, Filter, Description, User type, Sorting, Active).
WO Filters
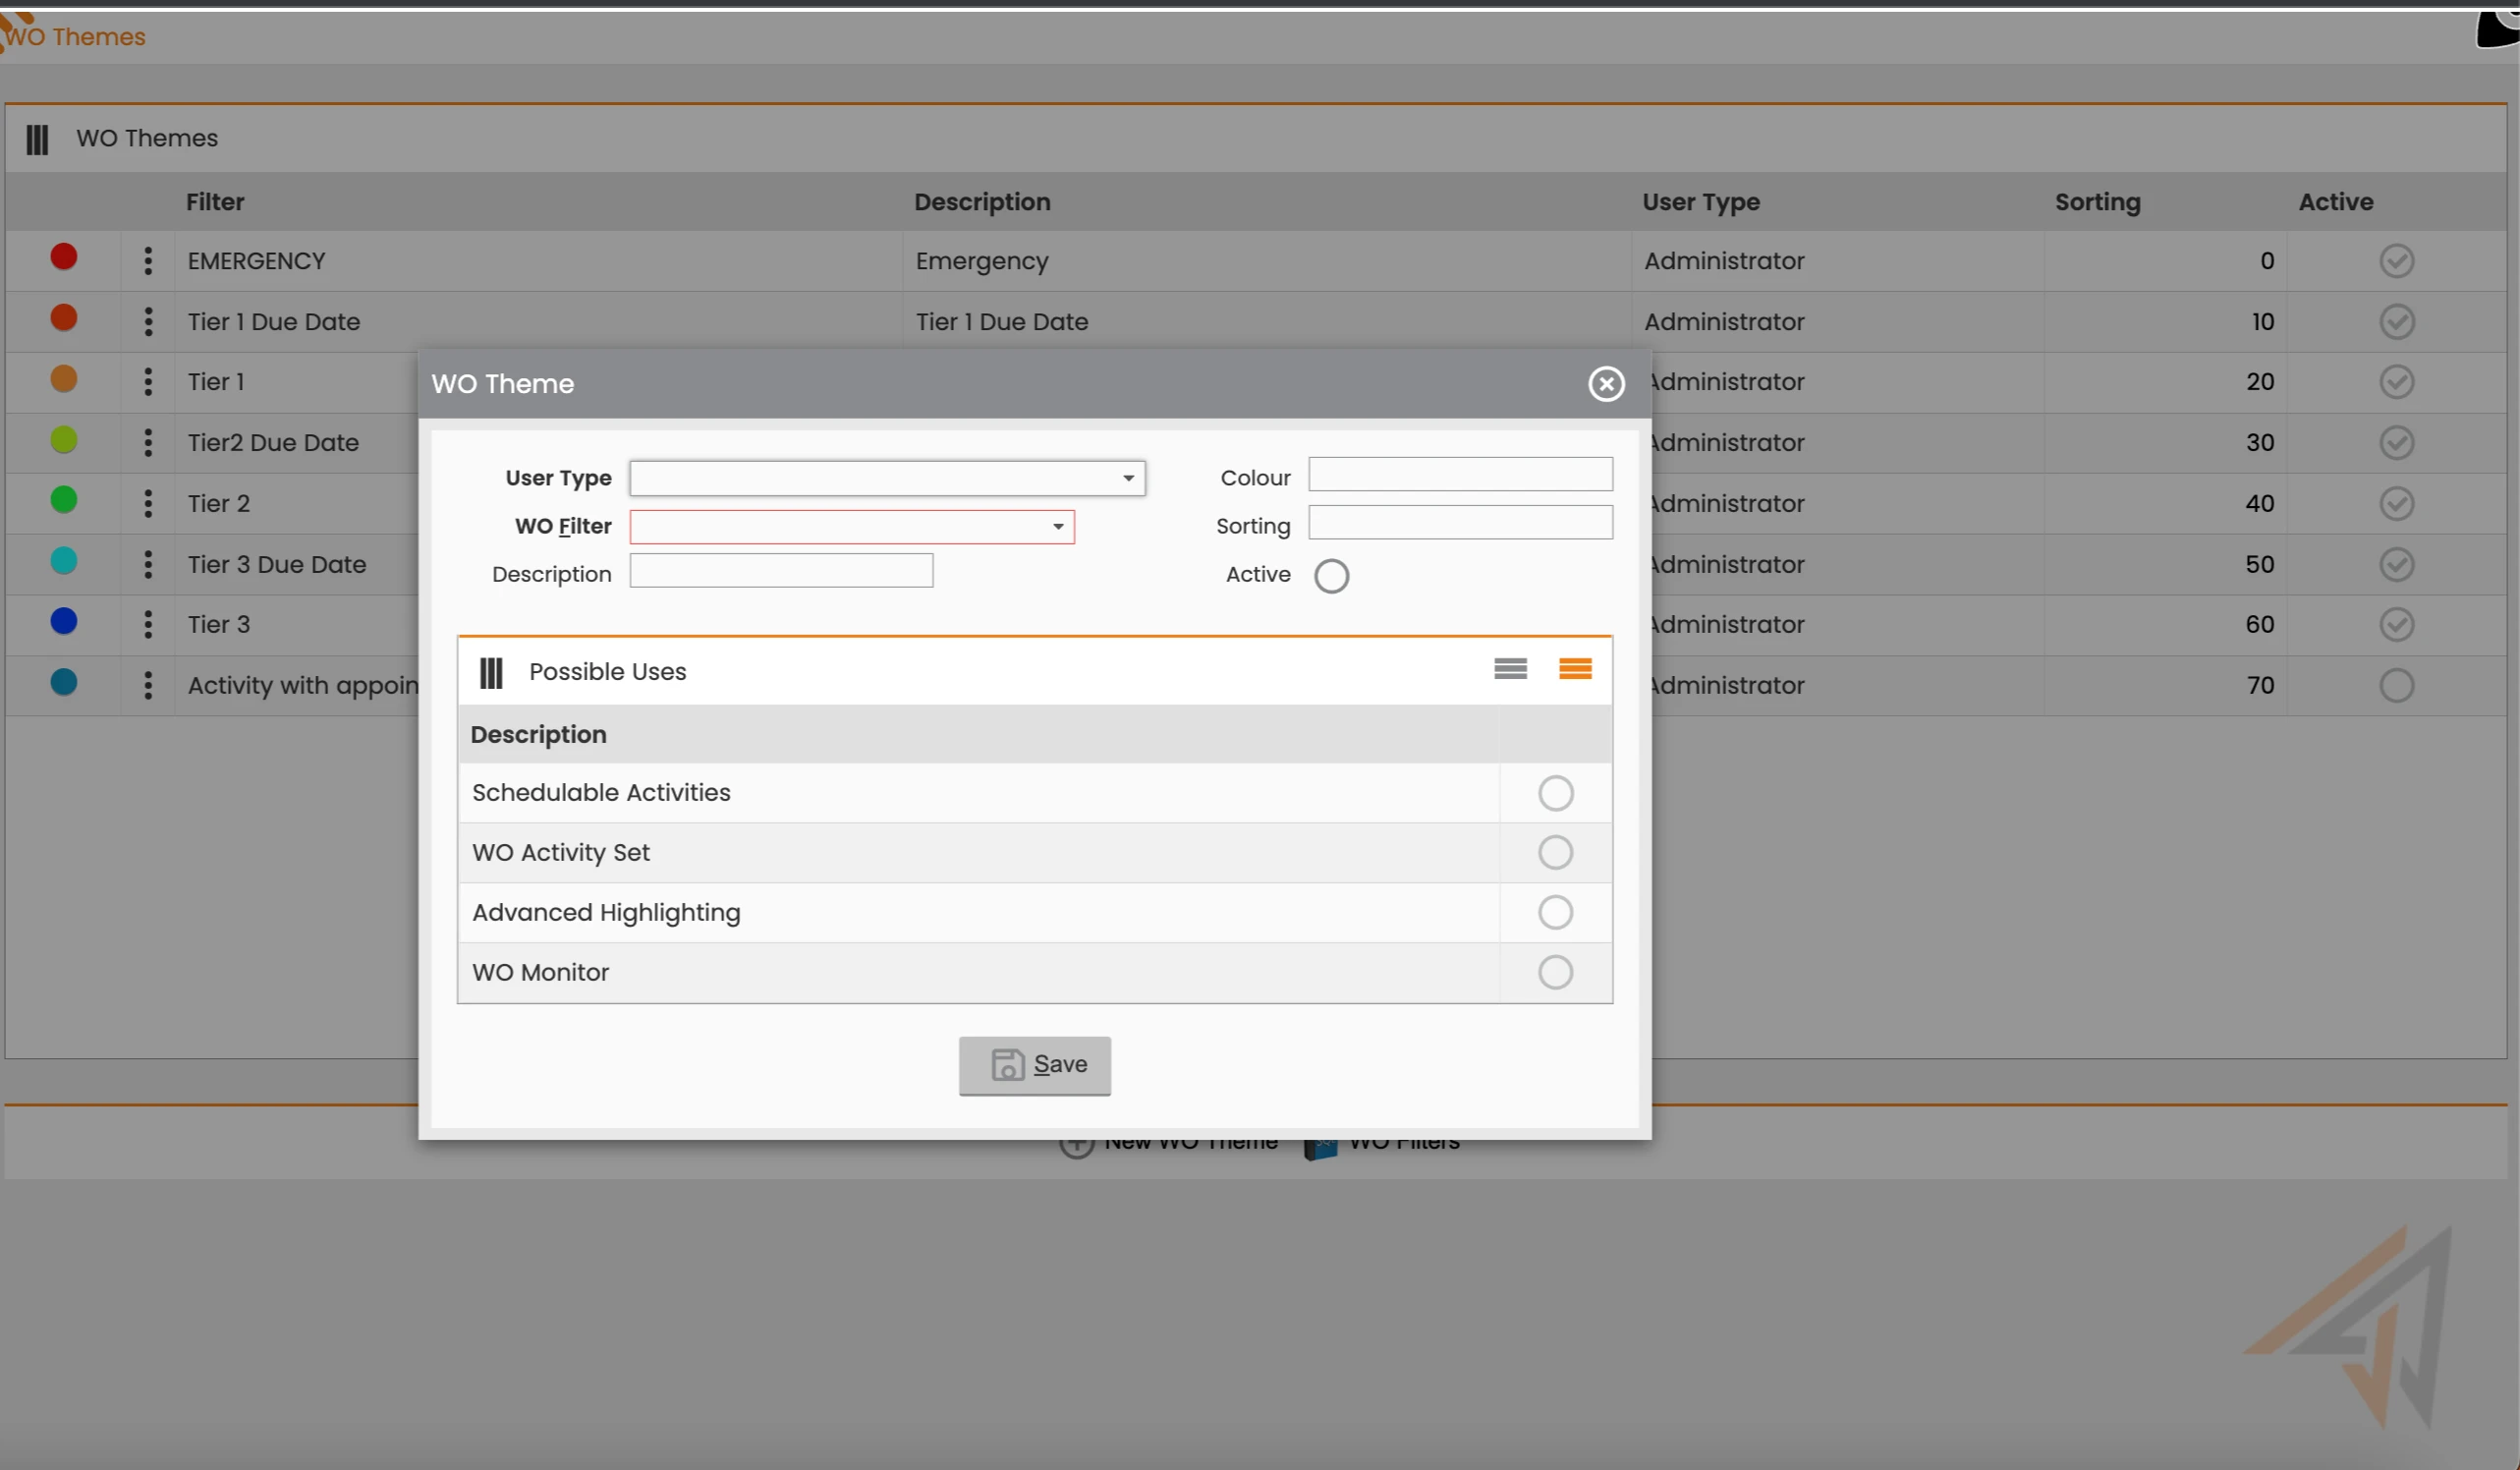
New WO Theme
Edit Theme
-
-
Associate Locations to a Theme: Below the theme fields, a table allows you to associate locations to your theme, determining where the theme will be active:
-
Schedulable activities: The theme is active when working with schedulable activities in the Daily Plan GANTT chart.
-
WO activity set: The theme is active when working with activities with specific characteristics (e.g., Urgency, chosen via WO filters) and will highlight them in the "Search WO" feature.
-
Advanced highlighting: This option makes the theme visible in the "Advanced Filters" section of the Daily Plan visualization configuration.
-
WO monitor: The theme is active when working with the "Notification and WO monitor."
-
-
Edit an Existing Theme: Click the three-dots option next to the highlighting information of an existing theme.
-
Create a New WO Filter: On the main WO Themes page, click WO filters.
-
This page displays a list of existing filters. You can filter by:
-
Code: The filter's name.
-
Description: The filter's description.
-
Value: Indicates if the filter is visible and usable.
-
-
Click New WO filter to create a new one. You can edit the Code, Filter Description, and filter display mode ("Visible" flag).
-
Manage Filter Clauses:
-
Delete Clause: Remove specific filter clauses from the "List of Filter Clauses" table.
-
Add Clause: Add new filter clauses to the "List of Filter Clauses" table.
-
-
Define Filter Clause: When adding a new clause, a window appears where you define a WO Filter Parameter. Select an Operator (e.g., "equals," "contains") from the available options, which will vary based on the parameter type. The system will then prompt you to complete further fields.
-
Note: For a WO to be included in the WO List defined by the filter, it must comply with all set filter clauses. Click OK to confirm or CLOSE to exit without saving.
-
-
By for each foreman: Colors activities based on the color assigned to a resource in the master data.
-
Example: If "Baker Thomas" has the color green, activities assigned to him will be highlighted in green.
-
-
By Validation Status: Colors activities on the Daily Plan based on the validation status of the intervention, manpower, and materials (red or green).
-
By All Multistage Groups: Colors all activities within the same multistage group with the same color for all multistage groups present on the Daily Plan.
-
By Selected Multistage Groups: Colors all activities within the same multistage group with the same color, but only for selected multistage groups present on the Daily Plan.
What's Next
After configuring themes, you can apply them to your Daily Plan to visualize data more effectively. You may also want to explore other configuration options within the FSM product to further tailor your user experience.