
As the first customization case, the need to add custom logics before and/or after the default logics should be mentioned.
An example of logic that can be inserted BEFORE the default ones can be the addition of a custom validation step on the request, while an example of logic inserted AFTER the default ones can be the addition of a step for creating/updating a record that is executed 'at the end' of the standard logics.
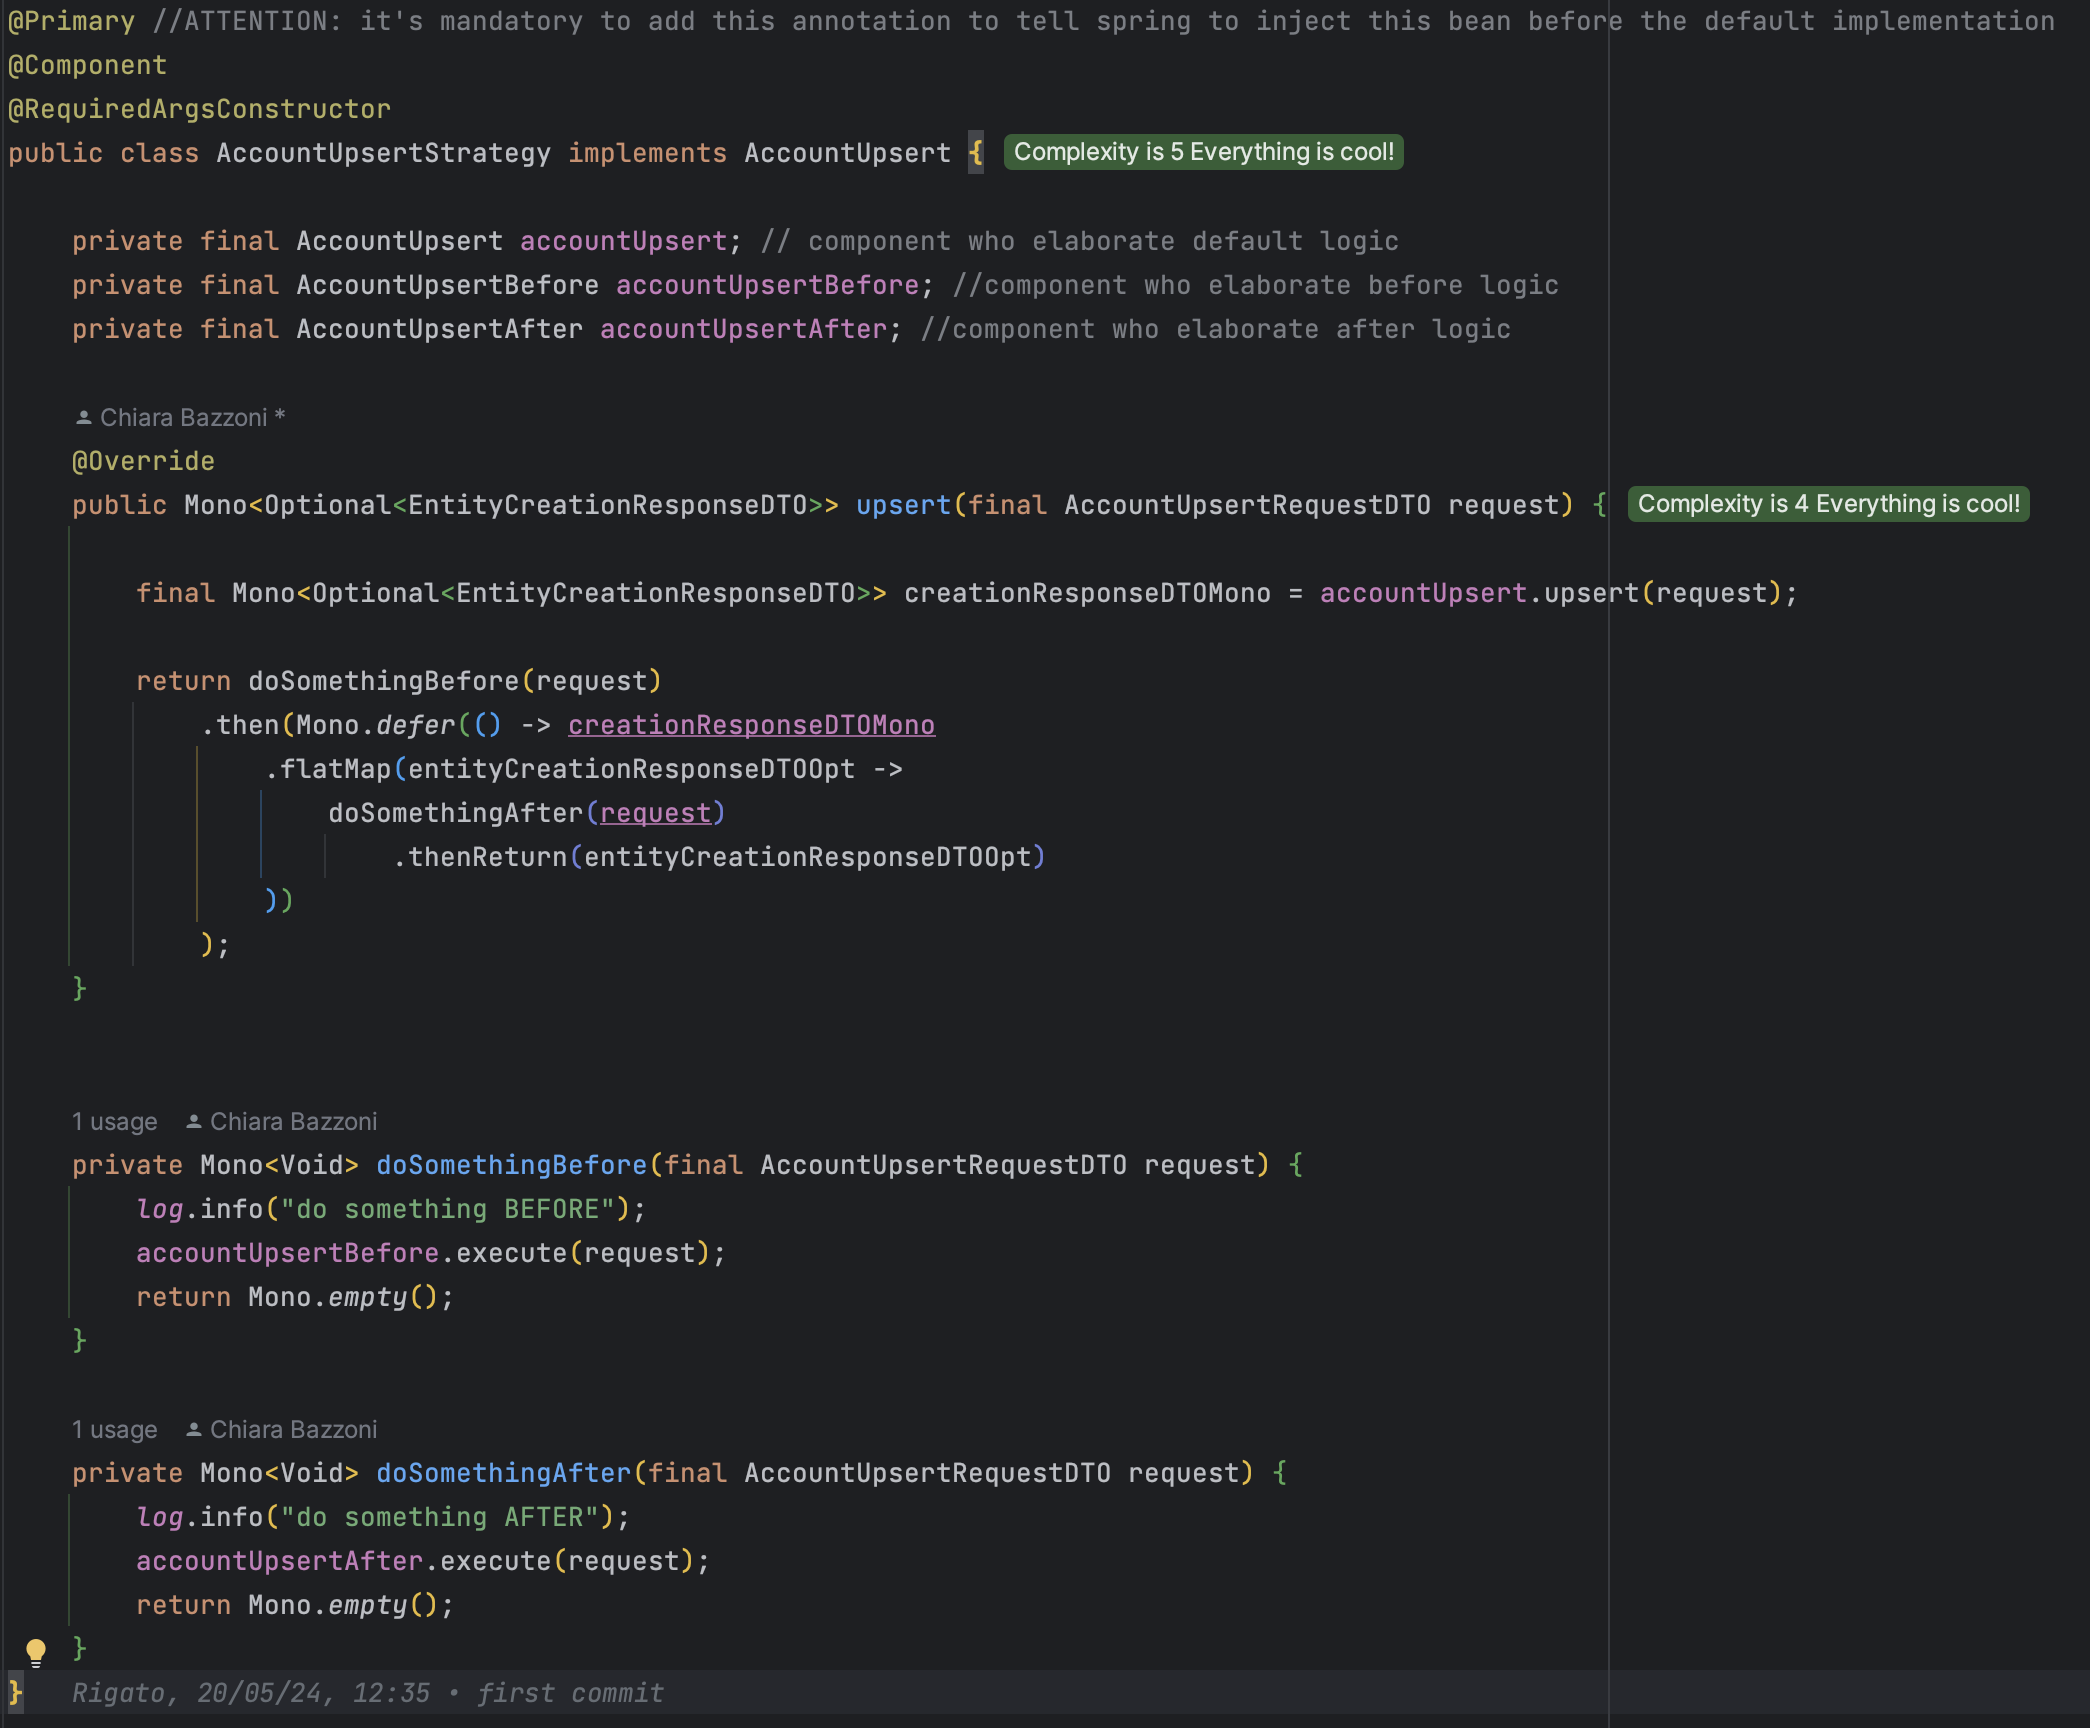
Let’s see in detail starting from the implementation example below:
Shopping list:
-
Create a New Custom class AccountUpsertStrategy which implements the legacy Component’s interface AccountUpsert
-
The new custom class must be annotated with @Primary annotation, otherwise the custom logic will not be executed before the default one
-
The new custom class must be annotated with @Component annotation so that it will actually have to take care of executing all the logic associated with the customized use case
-
The new custom class is annotated with @RequiredArgsConstructor annotation to generate the constructor to initialize the final members of the class
-
-
Inject the three fundamental components into the new class
-
First → the component with the default logic (existing AccountUpsert component’s interface)
-
Second → if needed, the component with the logic that have to be executed before the default one (to be created AccountUpsertBefore component’s interface and implementation)
-
Third → if needed, the component with the logic that has to be executed after the default one (to be created AccountUpsertAfter component’s interface and implementation)
-
-
Insert the custom logic in the Component’s overridden method.
The implementation in reactive mode offers numerous advantages, especially regarding performance, as it allows a certain elasticity of execution, i.e. the execution of two or more Monos can be carried out in parallel mode (for example by concatenating them in and) or in consequential mode, concatenating them, as in this case, with then(Mono.defer()) or flatMap. The choice of mono execution is clearly linked to the use case we are managing: if, as in this case, we need to maintain the execution order (stepBefore -> legacyCode -> stepAfter), the correct way to concatenate Monos is precisely with then(Mono.defer()), flatMap and thenReturn.
So, specifically, looking at upsert method’s return:
FIRST Mono with logic that needs to run first (doSomethingBefore)
THEN Mono with legacy logic (connected to previous Mono with then(Mono.defer()))
THEN Mono with the logic that needs to be executed after (doSomethingAfter connected to the previous Mono with flatMap, which is used to ‘capture and use' the body of the previous Mono and it activate itself only if the previous Mono actually terminate)
LASTLY output is returned wrapped in thenReturn, which is used to ‘create and return’ a new Mono with the object passed in input
Remember:
In the customization logic, which involves the addition of a step both before and after the default logic, the elements that must be created are:
-
AccountUpsertStrategy → Component class (annotated with Primary) which implements the custom component’s interface
-
AccountUpsertBefore → Component’s interface with the execute method exposed and implemented by:
-
Component’s class AccountUpsertBeforeImpl, which executes the custom logic that have to be done before the legacy one
-
-
AccountUpsertAfter → Component’s interface with the execute method exposed and implemented by:
-
Component’s class AccountUpsertAfterImpl, which executes the custom logic that have to be done after the legacy one
-