
This page aims to help the customization development phase, proposing guidelines, or simple tips, which allow external customizations to be included in the Integration API’s development mode.
Let's look at the following topics:
Customizations' packages
Whether you have developed the customization of an existing API or have created a new custom API, remember to include the development in a package that is as clear as possible.
-
First of all, use the base package integration
-
Then, based on the URL of the API you are customizing, complete the package name
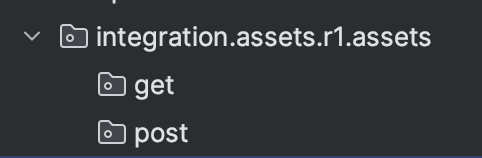
For example, if you have customized the GET assets/r1/assets API, the complete package will be integration.api.assets.r1.assets.get; while if you are modifying the POST, the complete package will be integration.api.assets.r1.assets.post (get or post are optional if there is a single customization, but it is important to distinguish the package if customizations for both get and post are present)
Remember
If you create a new custom API or update an existing one, for example PUT domain/r1/subdomain, the package will be integration.domain.r1.subdomain (*.put is mandatory only if an other customization is needed, for example the customization of GET domain/r1/subdomain, so you will have: integration.domain.r1.subdomain.put and integration.domain.r1.subdomain.get).
Validations
Validations must be separated from any other post or patch logic, as they must be done BEFORE the custom/legacy logic. Therefore, let's imagine that an existing API must be customized, adding a custom logic that must be executed before the legacy one: customization is possible but, please, pay attention to add needed validations.
The existing API has an exposed validation interface, with the name *Validation inside the validation package (if *Validation interface does not exist, report it to the IntAPI development team): if the custom development requires a new validation, it is essential that it is added by creating a new custom class that implements the *Validation interface.
So, if you need to customize an API by adding custom validation:
-
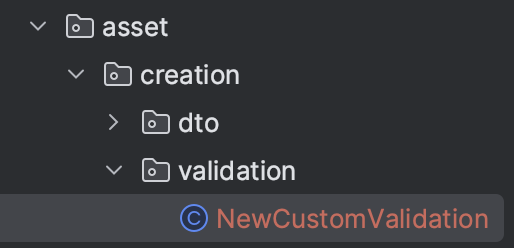
Create the validation package inside the main package (as we have seen in Customizations' packages) and the NewCustomValidation class
-
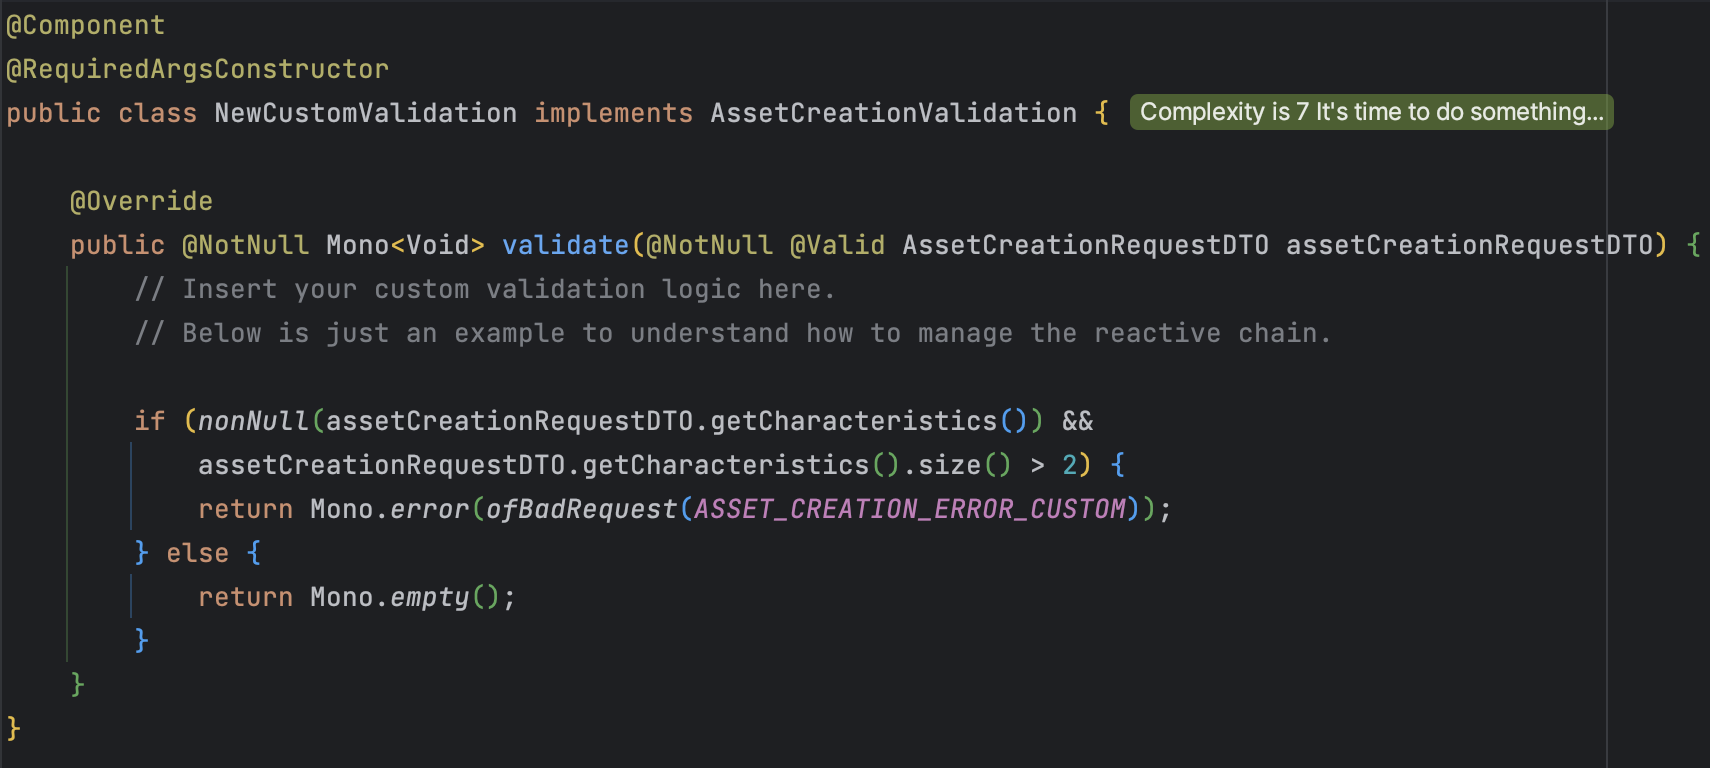
The NewCustomValidation class MUST implement the legacy interface AssetCreationValidation and execute the custom validation logic
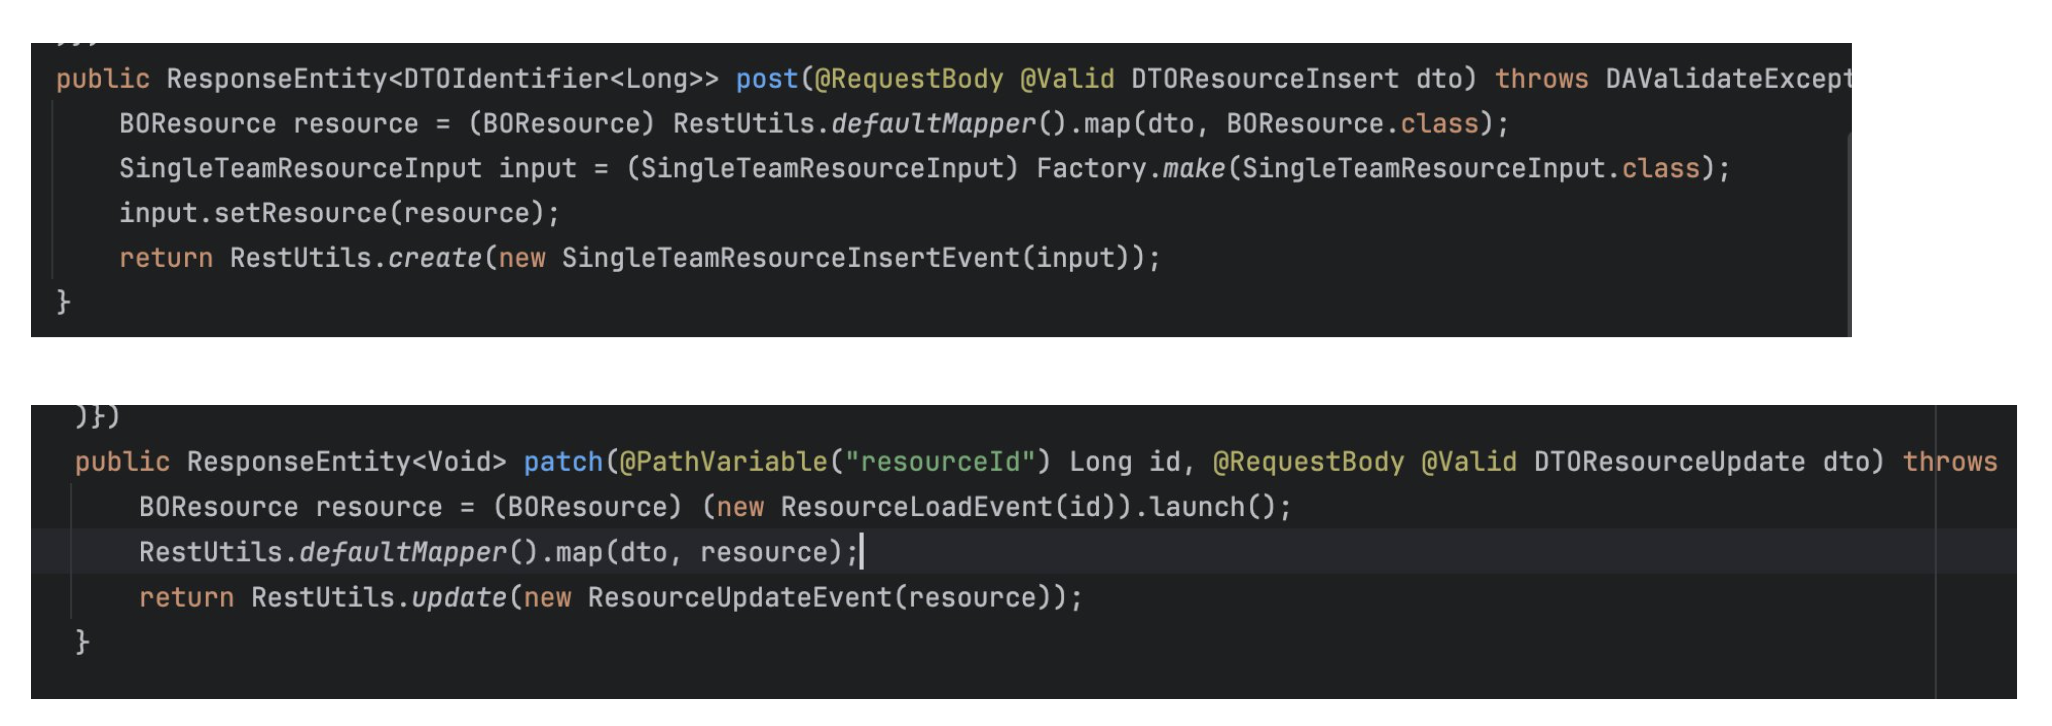
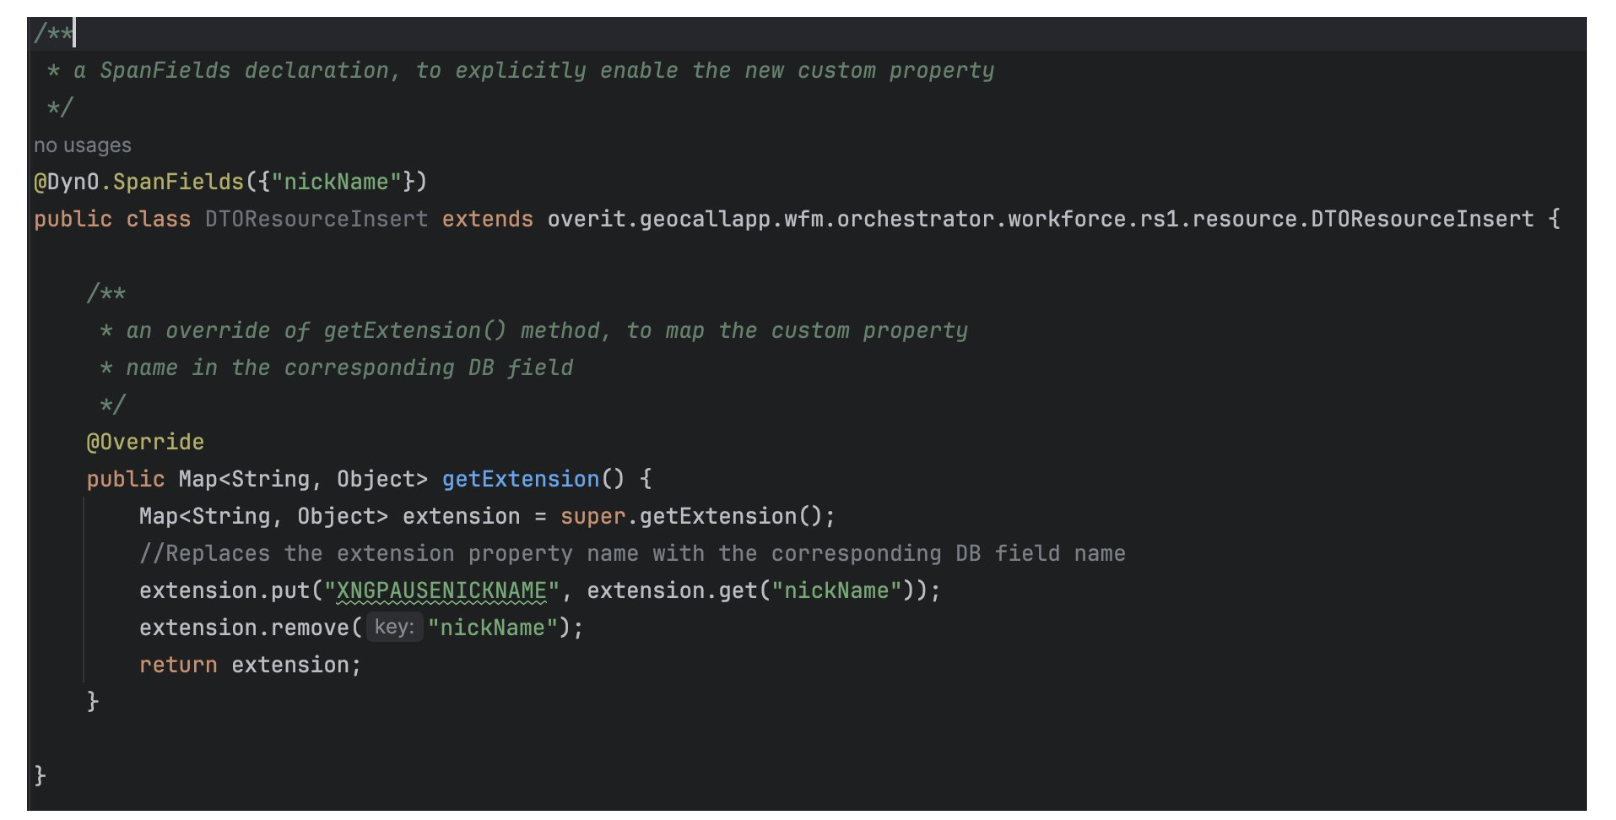
Do you need to add a custom field inside extension?
DTOs of the APIs exposed on Integration API project extend a DynO class which provides an extension field: extension is nothing more than a string-object map, which allows new fields to be added to the basic request; fields added, after having been validated, can actually be saved to the db.
So, how is possible to add a custom field?
Let’s see an example:
-
Identify on SWAGGER the API involved that manage the call on private api

-
With the two APIs extracted in step 1, search in the classes the methods that handles the rest call, and identify the DTO involved
-
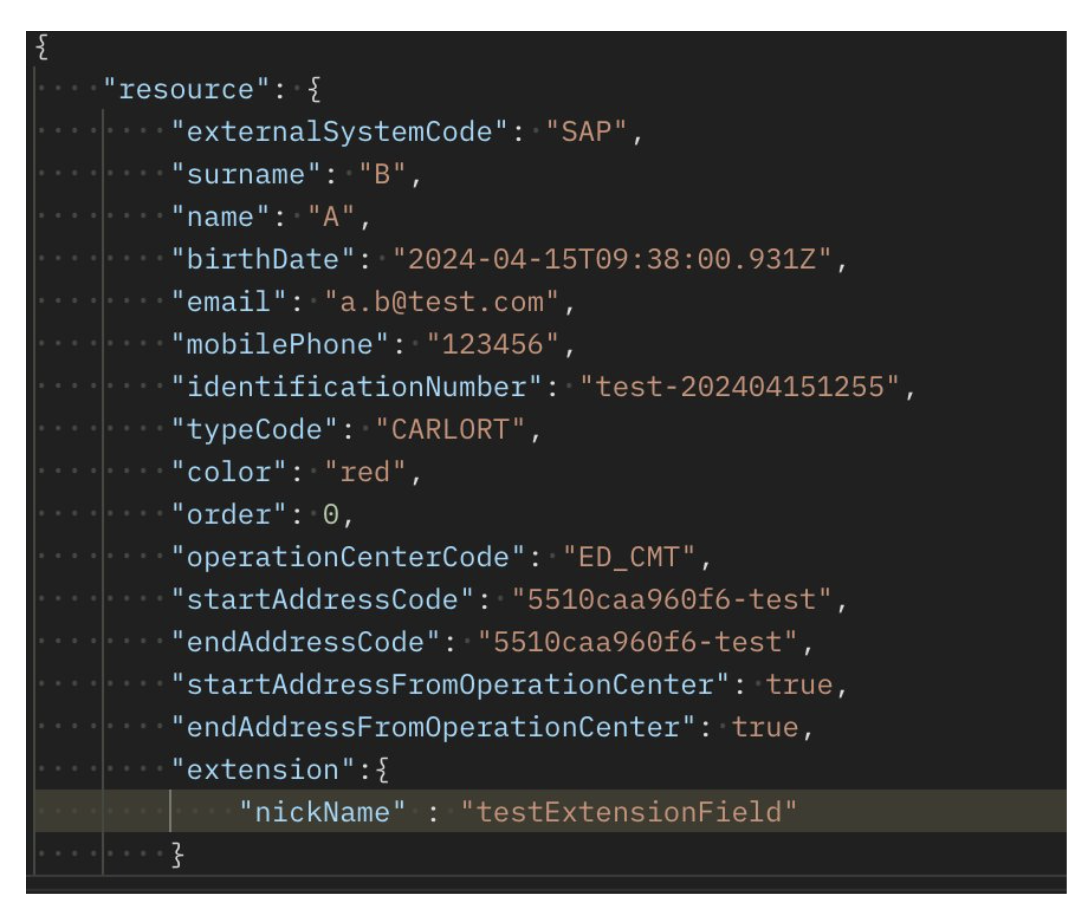
Customize and add in custom code the extension field
Remember
👉 Validations must be carried out before any other logic
👉 If you are trying to save a new custom field to db, you MUST validate it before save
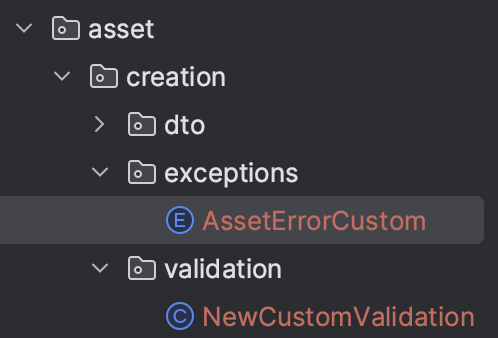
Exceptions
Are you customizing an existing API, or are you creating a completely new custom one in Integration API project, and need to handle an exception?
If answer is yes, Integration API provides the method ofBadRequest(APIError apiError, Serializable... errorParams) inside the APIException class, let's see it in detail how to use it:
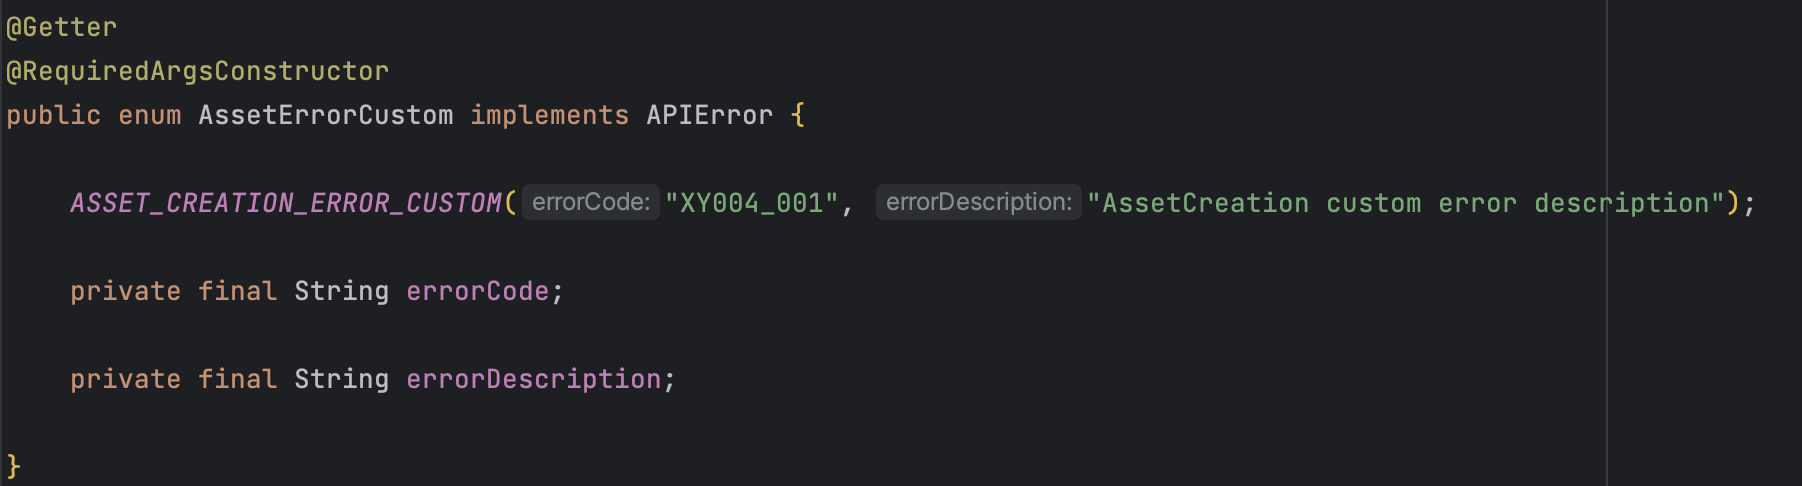
Inside the Integration API project you will find many *Error enum classes that implement the APIError interface, which exposes the getErrorCode() and getErrorDescription() methods; errors recorded within the enum classes have an errorCode and an errorDescription which must be recorded (therefore maintaining a standard structure) also on the Error Codes Integration API page.
-
Create a new package exceptions inside the customization one
-
Create a new enum class that implements the ApiError interface
-
using Error Codes Integration API as example page, create a new custom error, maintaining the domain number indicated on the previous page.
-
For example, if the customization concerns the asset domain and the project is called
Xxx Yyy the new error will be XY004_001, where:
XY = project name’s initials
004 = uniquely identifies the asset domain
_001 = sequential number which indicates, in this case, that it is the first error recorded
-
Use the new custom exception created inside the ofBadRequest(APIError apiError, Serializable... errorParams), as we have seen in the Validations code example:
Remember
If it's necessary to throw an exception in custom implementation, please use method ofBadRequest(APIError apiError, Serializable... errorParams) available in IntegrationApi project: so that is possible to maintain a centralized and consistent implementation with the project you are customizing.
How to call Private API
To understand how communication with PrivateAPIs occurs within IntegrationAPI project and how to make customizations, see https://overit-spa.atlassian.net/wiki/x/TgFzPxg page.
Useful tips
Annotations
You can find all the annotation below used in the customizations' examples
-
@RequiredArgsConstructor
Is a Lombok annotation that generates constructors for all final and non-null fields; using Lombok simplifies Constructor Injection.
Can i use it?
Yes, if you have Lombok dependency in pom.xml file.
How can I replace it, if i don’t have Lombok dependency?
a. Field Injection with @Autowired
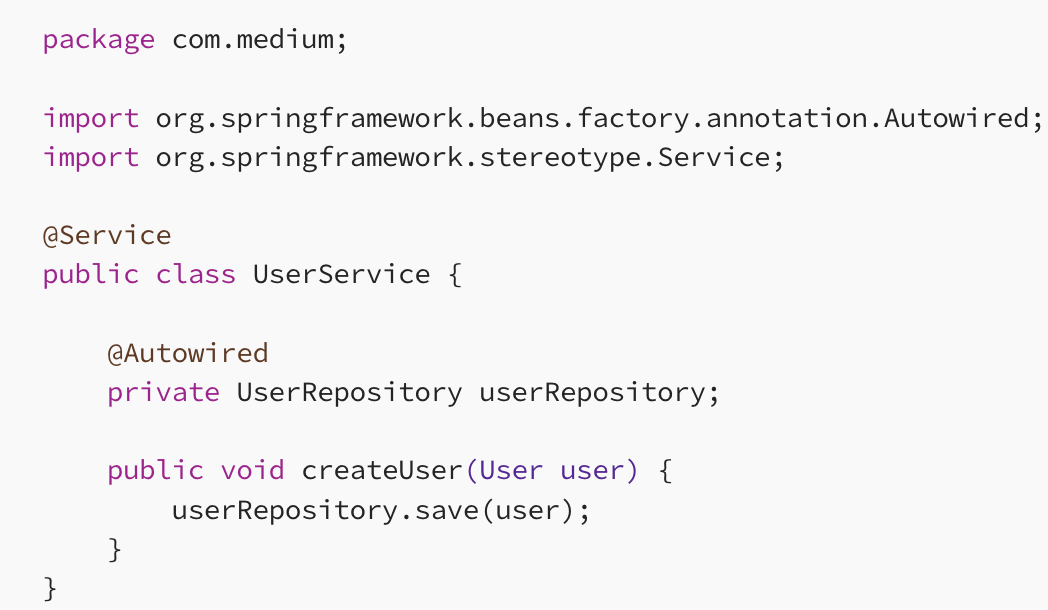
UserRepository dependency is injected into the UserService class using @Autowired on the field.
b. Constructor Injection
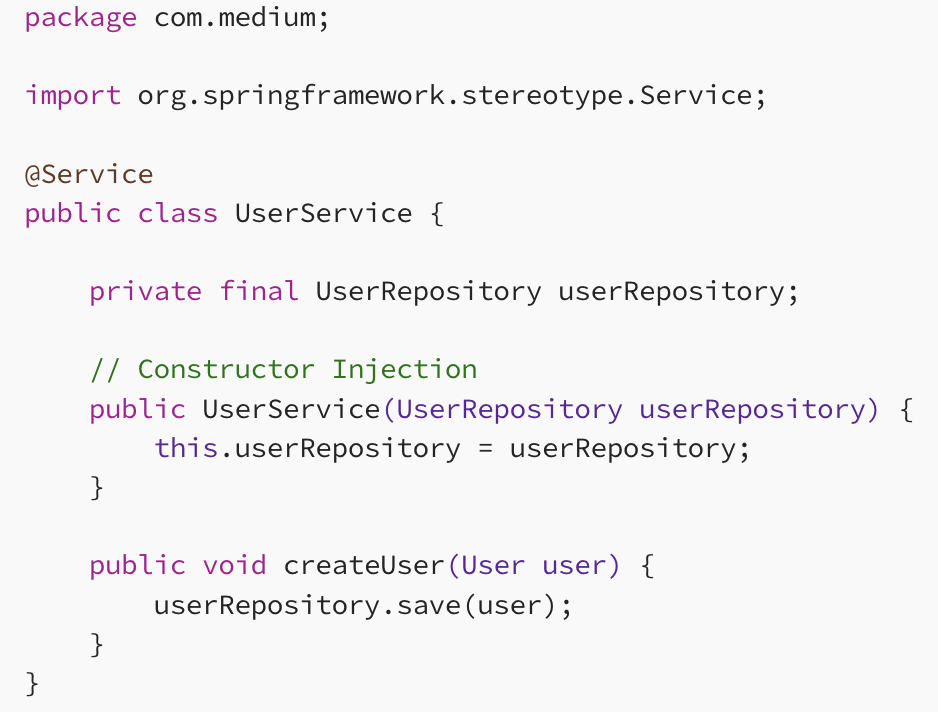
UserRepository dependency is injected via the constructor, and the userRepository field is marked as final, indicating that it cannot be changed after the object is constructed.
-
@Component
Is an annotation that allows Spring to detect our custom beans automatically.
Without having to write any explicit code, Spring will:
a. Scan our application for classes annotated with @Component
b. Instantiate them and inject any specified dependencies into them
c. Inject them wherever needed
-
@Controller, @Service and @Repository
These specialized annotations all act the same because they are all composed annotations with @Component as a meta-annotation for each of them. They are like @Component aliases with specialized uses and meaning outside Spring auto-detection or dependency injection.
-
@Primary
Use this annotation to give higher preference to a bean when there are multiple beans of the same type: in other words, use it to be sure that the custom logic will be executed before the default one.
Reactive
-
Mono.flatMap()
Used to ‘capture and use' the body of the previous Mono and it activate itself only if the previous Mono actually terminate
-
Mono.just()
Creates a Mono of the object passed in input
-
Mono.thenReturn()
Used to ‘create and return’ a new Mono with the object passed in input
-
Mono.defer()
Used to conditionally subscribe to a publisher: in simple words, when you want to be sure that execution order is maintained.
As we have seen in Add step before or after default elaboration
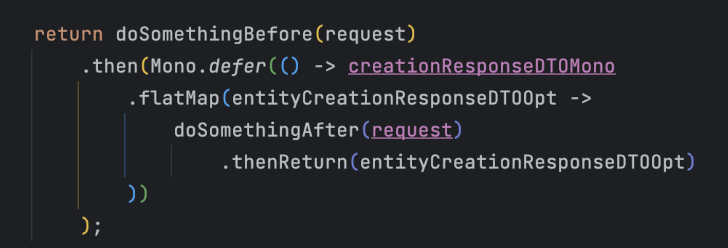
It is crucial that what is requested to be executed within the .then() is actually executed AFTER the execution of the doSomethingBefore() method is completed.