
This page is intended to define a customization standard in case it is necessary to execute some custom code before and/or after the standard execution of the Integration’s API.
It’s possibile to talk about API customization when it’s needed to add processing logic that allows to adapt the standard implementation to the needs of individual projects, without however overturn this implementation, so as to respect the use case associated with the API you are customizing. If you need to perform significant customizations that overturn the original behavior of the API, it is strictly recommended to proceed with the creation of a new custom API that uniquely identifies the required use case (see New custom Integration API ).
Let's look in detail at the API customization standard:
These two steps can be carried out together or individually, at the discretion of the project's wishes.
Examples of the following types of customization
are reported in https://overit-spa.atlassian.net/wiki/x/qIC0Thg
Add a validation step before standard elaboration
As the title suggests, this customization step allows you to add custom validation logic before the standard API execution.
Let's consider, for example, the case of Asset’s UPSERT: the UPSERT provides that the record can be updated (in case it already exists in the db) or created (in case it does not exist), so you might need to add an additional validation step, for example, only in the case where you update the existing record. How to do that?
All the APIs of the IntegrationAPI project, that are contained in the api package, have a validation package, which contains one or more interfaces (depending on the behavior of the API, if it is a GET case, with simple data extraction, there will be only one interface, if it is an UPSERT case there will certainly be more than one): these interfaces have been made available precisely to allow those who need to customize the API, to add a further validation step simply by creating a new component that implements the interface and executes the desired logic.
Returning to talk specifically about the Asset’s UPSERT, in the image below you can see the two interfaces present in asset.upsert.validation, one that allows you to customize the generic case of UPSERT (AssetUpsertValidation) and one that allows you to customize the specific case of UPDATE (AssetUpdateValidation), but what about CREATION?

If the custom validation step needs to be added in the CREATION phase, just create a new class that implements AssetCreationValidation (like the two visible in the image AssetCodeAlreadyExist, AddressFoundByAssetCodeHasTargetIdValued); indeed, in the specific case of Asset’s UPSERT, to make the code as reusable as possible, it was decided to divide the creation step from the update one, which is why there are two separate packages, one for upsert and one for creation, with the two specific validation packages.
In the following image we can see how to correctly create a custom validation class that implements the generic validation interface:
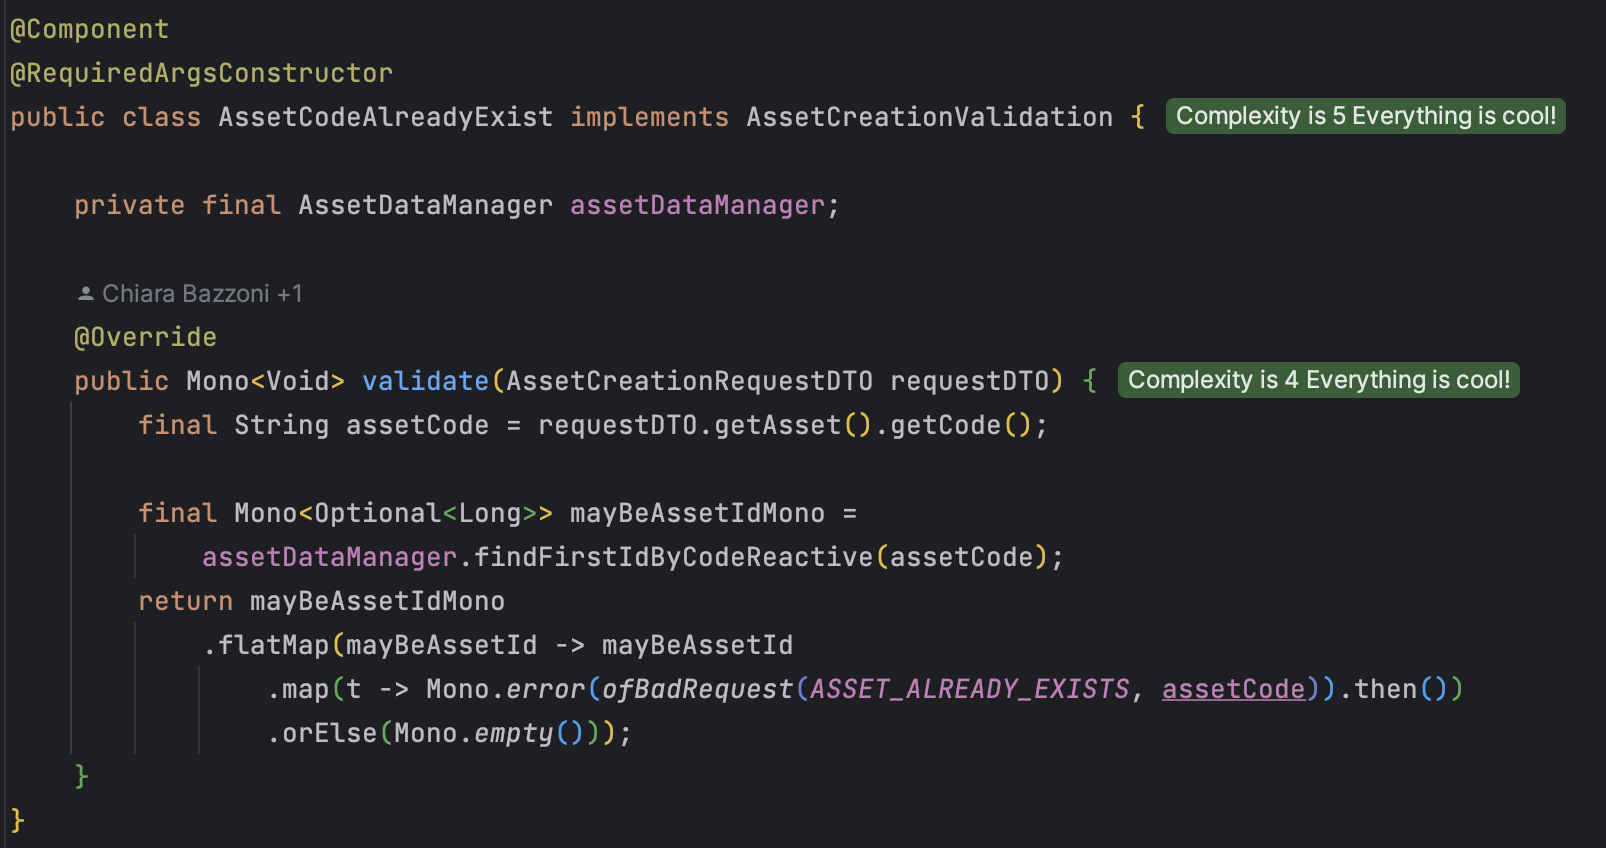
Steps:
-
Create a new class with a meaningful name, that makes clear the intent of the custom validation step you are adding.
-
Makes the newly created class implement the validation interface associated with the use case you intend to customize.
Attention
In case there are 3 interfaces as in the case of UPSERT, one for generic validation of the UPSERT request, one for the request’s validation in the specific case of UPDATE and one for the request’s validation in the specific case of CREATION, take care to correctly identify the hook point of the custom validation class to avoid that, for example, a validation that must be inserted only in the case of creation, is performed before everything in the generic case of upsert.
-
Remember to annotate the class with @Component and, if needed, also @RequiredArgsConstructor (see page Development tips | Annotations for more details about annotations).
-
Considering that, by implementing the validation interface, the validate method will be overridden, and a Mono<Void> must be returned, so make sure that the implementation respects the Mono chain and the required output; in any case, there are several examples in the code to rely on for inspiration and, for any doubts and/or curiosities about the Mono context, look at the pageDevelopment tips | Reactive.
Add a custom step after standard elaboration
Let's now see in detail how to proceed to add custom logic to be executed after the default logic.
As in the case seen previously, even when we have to add a custom execution step that must be executed downstream of the legacy execution, we must refer to a specific package that we find in each of the APIs, the extension package, which contains an *AfterProcessing interface.
Taking the case of Asset’s CREATION as an example
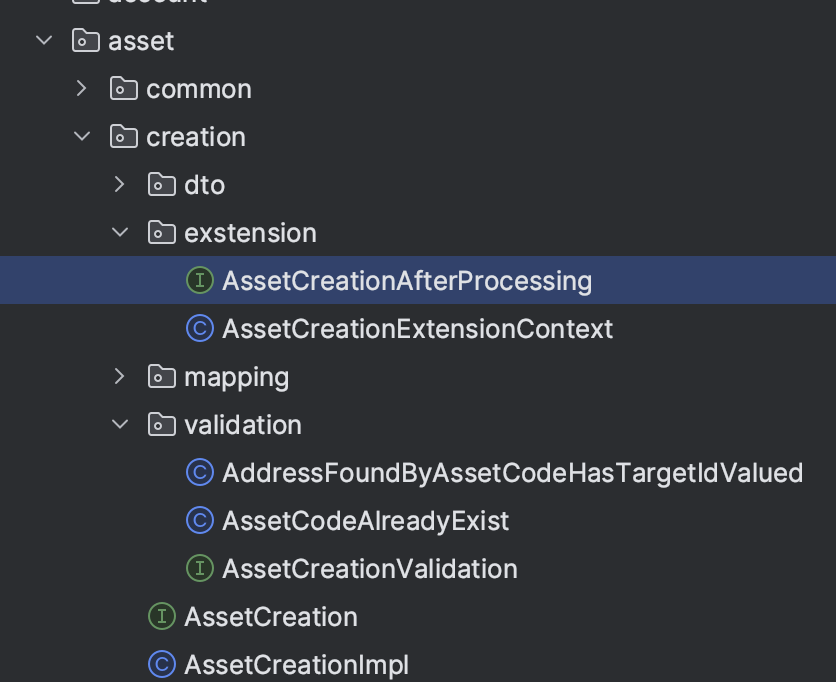
you can see, in the image above, that there is the interface AssetCreationAfterProcessing, that must be implemented to add custom logic, and a ‘context' (AssetCreationExtensionContext) that defines the input and, eventually, the output that must be managed by the customization interface, so as to also be sure that the correctness of I/O remains in the API’s flow.
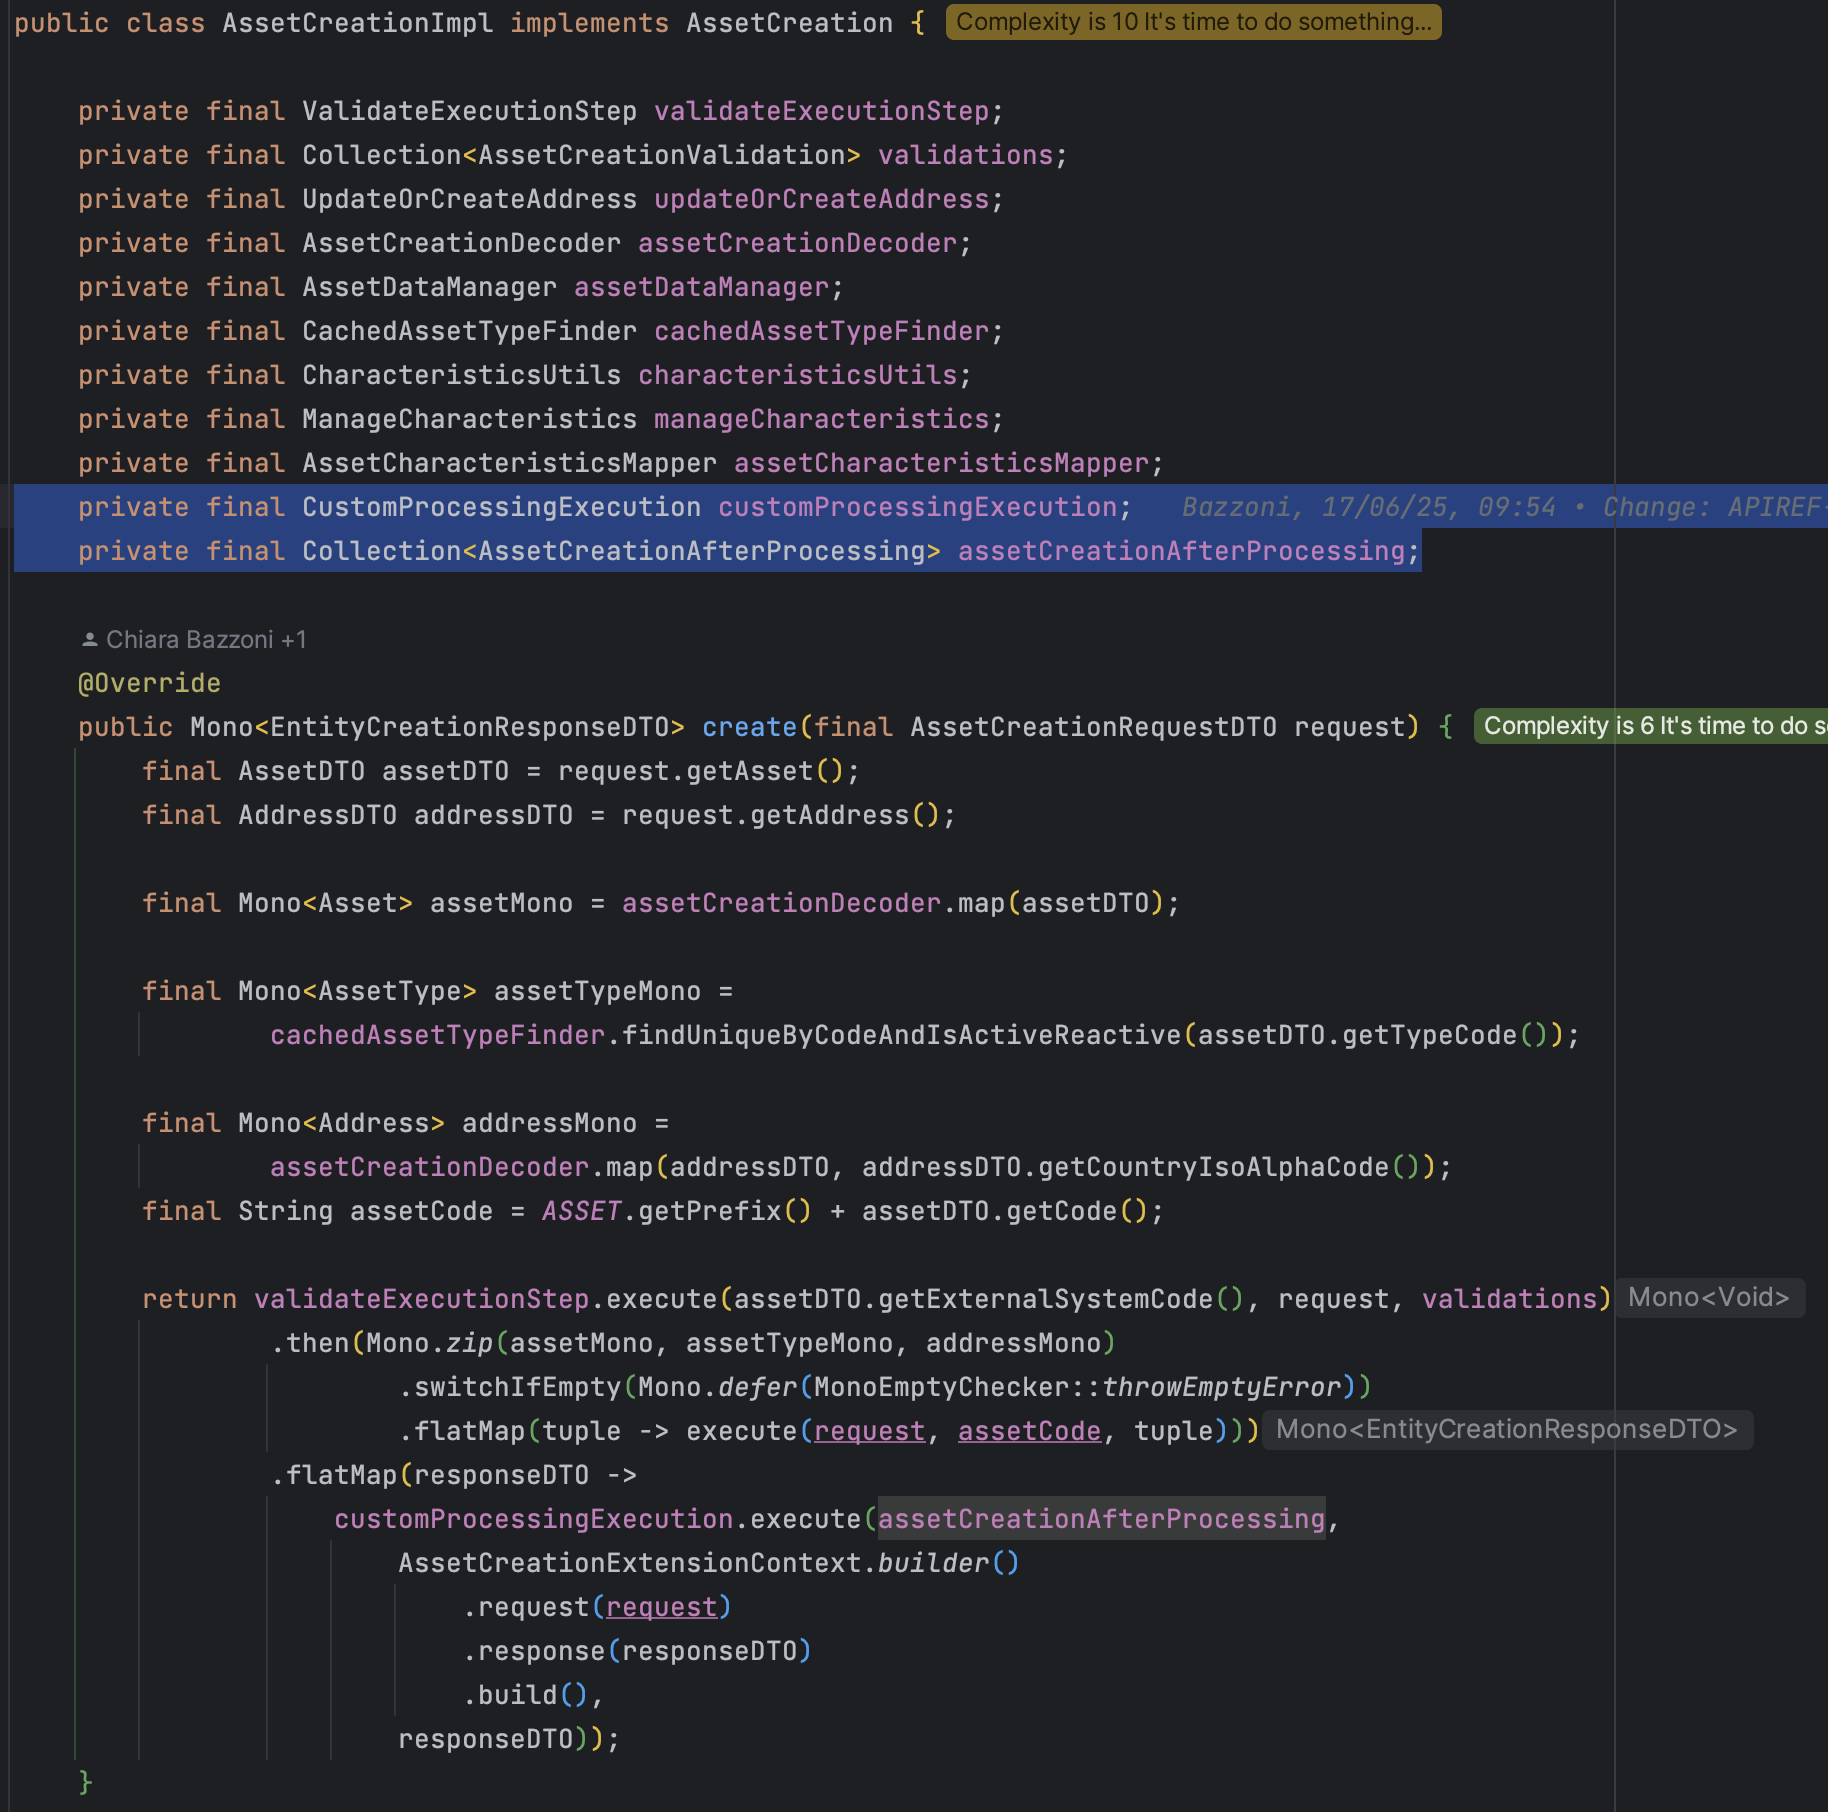
To see in more detail what has been done in IntegrationAPI project on all the exposed APIs, below you can see the detail of the AssetCreationImpl class which, exactly as all the other APIs' implementations, presents:
-
The injection of the generic customization interface CustomProcessingExecution, which allows the execution of the execute method of the CustomProcessingStep interface extended by all the customization interfaces of the individual APIs.
-
The injection of the collection of the *AfterProcessing’s customization interfaces of the individual APIs.
-
The execution, downstream of the legacy implementation, of the custom logic, called through customProcessingExecution.execute() which takes as input the list of implementations of the *AfterProcessing interface (therefore the list of all the necessary customization steps), the context (in which the request is set and, if present, the response) and the response that was returned by the legacy implementation.
So, how to correctly implement a custom AfterProcessing class that implements the generic *AfterProcessing interface?
Steps:
-
Create a new class with a meaningful name, that makes clear the intent of the custom execution step you are adding.
-
Makes the newly created class implement the *AfterProcessing interface associated with the use case you intend to customize.
-
Remember to annotate the class with @Component and, if needed, also @RequiredArgsConstructor (see page Development tips | Annotations for more details about annotations).
-
Considering that, by implementing the *AfterProcessing interface, the execute method will be overridden, and a Mono<Void> must be returned, so make sure that the implementation respects the Mono chain and the required output; as mentioned before, in any case, there are several examples in the code to rely on for inspiration and, for any doubts and/or curiosities about the Mono context, look at the pageDevelopment tips | Reactive.